
How to Bake Better Bread at Home
For full recipe archives, instructional videos, and searchable categories, join our Cooking Community here.

I've made inedible bread. In fact, I've made a lot inedible bread. If you dabble at all in yeast, flour, salt, and water, you and I may have shared similar experiences. And as experience is the best teacher, I'm here to share with you how to bake better bread at home.
Because if you've ever opened that oven door to see a flat, underbaked, burnt, or sloppy loaf, you know all too well that disappointment.
Ten years ago, I began baking bread with the cheapest flour I could buy, vegetable oil, vital wheat gluten, white sugar, and commercial yeast. Though far from nutritional, it was certainly a step in the right direction. I'll never forget when I pulled those first, fragrant loaves from the oven. "This is it.", I thought. "I did it. I'm a homemaker!". I took such pride in those loaves.
I've never been one to stand still, be it with gardens, work, or dreams. My bread making didn't stand a chance. Twasn't (yes, I said twasn't) long before I began experimenting with sprouted flours, whole grain flours, organic flours, honey, syrup, sea salt, steam, and sourdough.
They were edible. But not much more.
My best results often came from high amounts of commercial yeast and high gluten bread flours.
But that wasn't quite what I wanted.
As my homemaking spirit developed, my baking skills improved, and my desire to tap into something more historic and old world grew, I began tapping into heirloom grains. Partly for their flavor, partly for their nutritional profile. Still, it took skill to learn to bake bread well. Skill that was only solidified when someone took the time to finally sit down and show me how the heck to do it right.
Allow me now to share with you. Save yourself years of bad loaves. My many baking flops are your gain. Here's how to bake better bread at home.
How to bake better bread at home | The Elliott Homestead
How To Bake Better Bread At Home
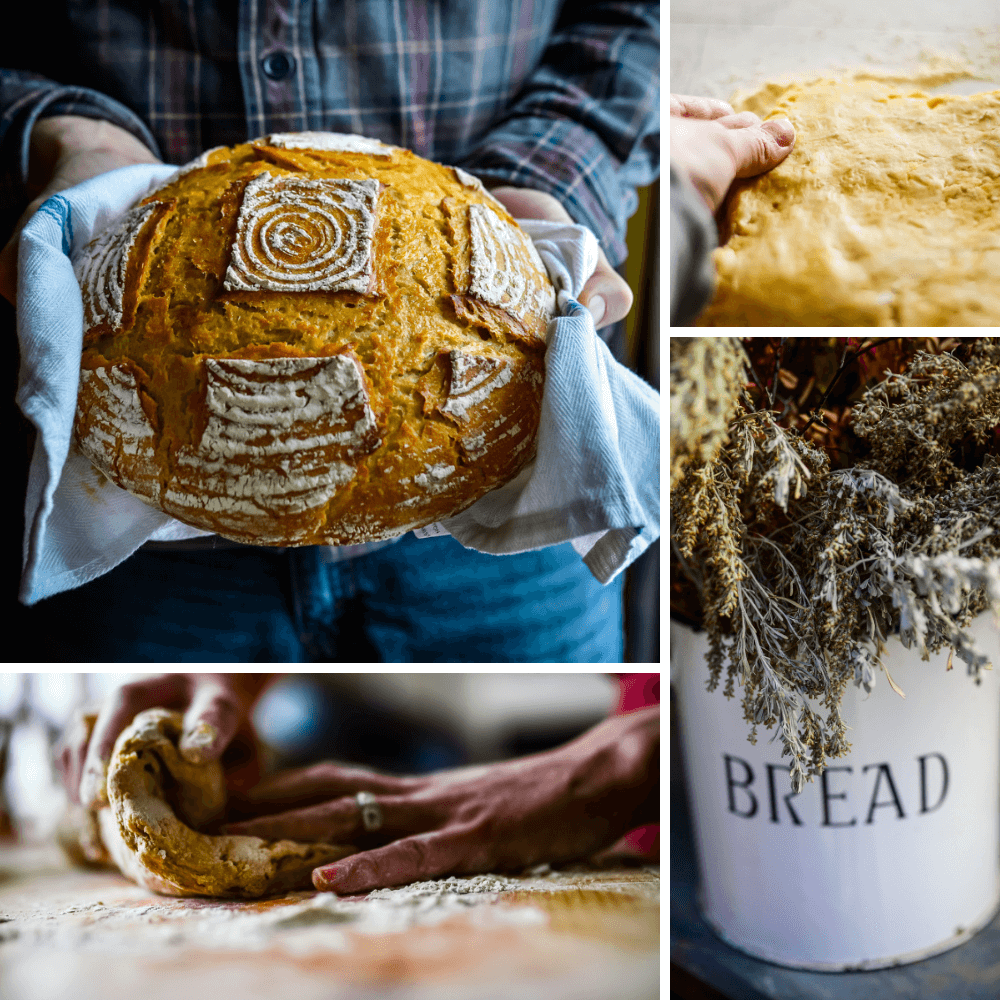
1. Use sourdough. I know. Don't hate me. But learning to bake with the wild yeasts contained in a sourdough starter will make you a strong baker in the long run. Couple that with the fact that sourdough starter is alive, extremely beneficial for your body, and is easier to digest than commercial yeast bread... and well, you can see why I'm arguing in its favor. Even if you don't care about the health aspects of your bread at all, a good, strong sourdough starter will ultimately give you something that commercial yeast can't ever match - a depth of flavor. We often think of sourdough as the weird, sour baguette loaves our parents brought home from the grocery store, but a good sourdough doesn't have a tartness at all. Instead, it boasts a layer of flavor that adds a different shade of enjoyment to your loaf. Don't tell me you don't like sourdough. Learn to bake properly with it and I'm confident you will. The best bread comes from sourdough. Fact.
2. Keep a "dry" sourdough starter. Carla, the founder of Jovial Foods, was the woman who taught me to keep a "dry" sourdough starter and for that I am, truly, forever grateful. She has revolutionized the chore involved with keeping a healthy sourdough starter. For years I maintained a wet, stinky, moldy sourdough starter that seemed to do well at certain times of the year and totally flop other times. The result was loaves that didn't rise consistently (or at all). Can you relate? Surely I'm not that only one who's baked bricks here? A dry sourdough starter uses a small amount of flour and a small amount of water to maintain a starter that's as solid as a regular bread dough. When it's time to bake the bread, a small piece of the starter is removed and added to a bowl with warm water and flour. In a few hours, that mixture (called a levain) is bubbling and ready to be mixed in with the final bread. You can watch Carla's detailed video on how to keep a dry sourdough starter here. If you haven't had success with sourdough in the past, the number one piece of advice I can give you is to keep a sourdough starter just like Carla recommends in the video.
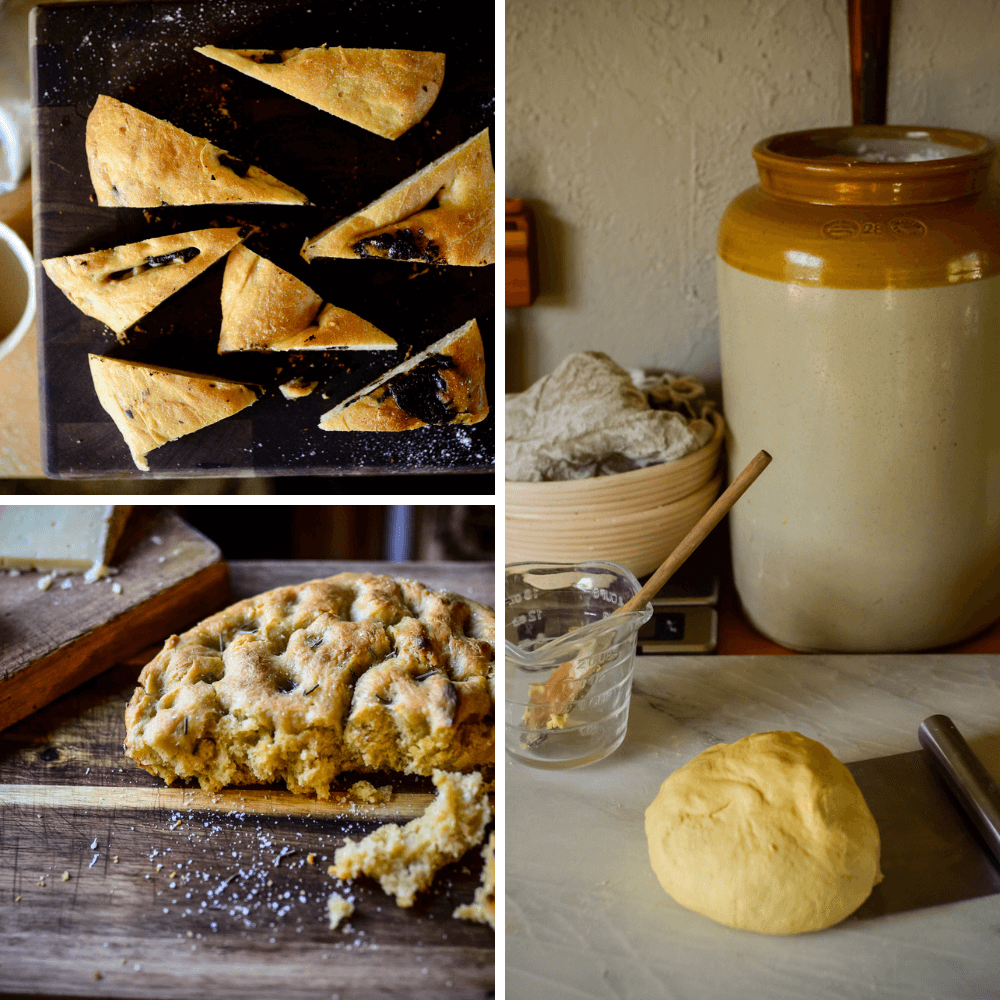
3. Bake with organic, heirloom grains. Einkorn is my favorite. Using organic, heirloom grains sounded fussy and non-practical when I was a novice. As I've continued to bake bread, I've settled on one important fact: these grains taste better. That's it. They taste better! The bread that is more delicious than less delicious bread is bread I want to eat. Know what I'm saying? There are certainly other factors such as gluten content, protein content, and digestibility factors (you can read more about that here), but at the end of the day, they taste phenomenal. Though I utilize rye on occasion (because I love the flavor), einkorn flour is my absolute go-to. Every item I bake is baked with einkorn flour. It's rich and buttery. Can't afford it? Price it next to your average loaf of bread or baked goods from the grocery store. You'll be surprised. Ounce for ounce, it's less expensive than you realize. If you want your bread to taste better (and make you feel better), you simply must switch from modern wheat to heirloom varieties. Here's the brand I use.
Sourdough Einkorn Bread | The Elliott Homestead
4. Use a digital scale. Why, oh why, did we give up weighing ingredients? A cup? What is that even? Oh, how I've grown to despise such inaccuracies. If your bread has been too wet, too dry, or too dense, a digital scale will be the very best step you can take to changing that. Why? Because it's impossible to measure ingredients accurately with crude measuring cups and spoons. In my Cooking Community, I've been presenting every baking recipe using weight measurements because the results are far more consistent for the bakers. Isn't that what we hope for? Consistent results? Invest in a fairly inexpensive digital scale like this one and begin to follow recipes that use weight instead of volume. European recipes are your friend. Baking with a digital scale has given me such confidence in my baking because I know if I follow the weights, the bread will turn out just lovely. There's no cross my fingers and hoping it brings a smashing result. It always does now. Because it's consistent.
5. Bake in a HOT oven. I know, right. Seems basic. But give your oven time to heat up. Like a full hour. Seriously. It needs that long to get proper hot for bread. Baking in a luke-warm oven will result in a luke-warm-looking loaf with a luke-warm-crust. Ain't nobody want that.
6. Bake with sea salt. Again, seems basic, but for years I baked with table salt and the result was an almost medicinal tasting bread. Opt instead for a nice sea salt like this one so you can enjoy an earthly, briny, rich salt flavor.
7. Utilize a dough scraper and marble cutting board. These two tools completely changed my feelings towards making bread. What used to feel like a chore now feels like pure pleasure. Yes, I'm being serious. But why? Well, because they make it less messy... less fussy... easier to clean up... and easier to handle wet doughs. I bought a marble cutting board like this one and flipped it on it's back. The back was unfinished and perfect for soaking up small amounts of moisture from the dough (yes, there's an actual reason why marble countertops are a thing). It's the perfect surface for bread making. My marble slab sits on my wood countertops 24/7. What makes clean up such a breeze is the super inexpensive dough scraper. This can be used to turn the dough (so I don't have to get it on my hands), transfer the loaves to proofing baskets, and scrape the marble work surface free of any extra flour in just a few swipes. It's the best. Literally. The best.
Want to know how to bake better bread at home? Follow #1-7. You'll do great things.
Easy homemade bread | The Elliott Homestead
As a special nod to more delicious bread, I'm going to share my favorite Everyday Einkorn Loaf with you. To good bread baking!
Everyday Einkorn Bread
30 grams sourdough starter
120 grams warm water
130 grams all-purpose einkorn flour
315 grams warm water
400 grams all-purpose einkorn flour
200 grams whole-grain einkorn flour (or whole grain flour of choice)
2 teaspoons salt
For the levain, combine the sourdough starter, 120 grams of water, and 130 grams of all-purpose einkorn flour together in a large non-metallic bowl. Use a fork to combine until smooth. Cover the bowl with plastic wrap and set aside in a warm place for 3 hours until small bubbles begin to appear on the surface.
After that time, add in 315 grams of warm water to the levain. Stir to combine. Add in the 400 grams of all-purpose einkorn flour, 200 grams of whole-grain einkorn flour, and salt. Use a wooden spoon or stiff spatula to combine. Cover the bowl with plastic wrap again and set aside for fifteen minutes.
Dump the bowl contents onto a gently floured marble slab. Use a dough scraper to fold the dough in on itself from each side. Place the bowl upside down over the dough and let it rest for another fifteen minutes.
Repeat the dough scraping and folding once more. Again, place the bowl upside down over the dough and let it rest another fifteen minutes.
Repeat the dough scraping and folding once more. This time, transfer the dough back into the bowl, cover tightly with plastic wrap, and set aside for four hours to proof.
Preheat a Dutch oven and it’s lid in a 475-degree oven for 1 hour.
While the oven is preheating, use a bowl scraper (or mason jar lid) to scrape the proofed dough onto a gently floured cutting board. Gently shape the dough by grabbing the edges of the dough and pressing them back into the center with your fingertips. Transfer the loaf to a heavily floured proofing basket. Cover the basket with plastic wrap and let proof at room temperature for 1 hour.
When you’re ready to bake the bread, remove the Dutch oven from the hot oven. Remove the lid. Carefully flip the proofing basket into the Dutch oven to transfer the bread in. Cut the top with a razor blade or sharp knife if desired. Replace the lid and bake for 30 minutes. Remove the lid and bake for an additional 15 minutes until the bread is deeply golden and sounds hollow when tapped.
Remove the Dutch oven from the oven and remove the bread to a wire cooling rack. Let cool for at least an hour before slicing.
If you wanted detailed videos of baking fabulous bread (and much more), you can join our Cooking Community here. I hope these tips have shown you how to bake better bread at home!
And Amen.
Everyday Einkorn Bread
30 g sourdough starter
120 g warm water
130 g all-purpose einkorn flour
215 g warm water
400 g all-purpose einkorn flour
200 g whole-grain einkorn flour (or whole grain flour of choice)
2 tsp salt
For the levain, combine the sourdough starter, 120 grams of water, and 130 grams of all-purpose einkorn flour together in a large non-metallic bowl. Use a fork to combine until smooth. Cover the bowl with plastic wrap and set aside in a warm place for 3 hours until small bubbles begin to appear on the surface.
After that time, add in 315 grams of warm water to the levain. Stir to combine. Add in the 400 grams of all-purpose einkorn flour, 200 grams of whole-grain einkorn flour, and salt. Use a wooden spoon or stiff spatula to combine. Cover the bowl with plastic wrap again and set aside for fifteen minutes.
Dump the bowl contents onto a gently floured marble slab. Use a dough scraper to fold the dough in on itself from each side. Place the bowl upside down over the dough and let it rest for another fifteen minutes.
Repeat the dough scraping and folding once more. Again, place the bowl upside down over the dough and let it rest another fifteen minutes.
Repeat the dough scraping and folding once more. This time, transfer the dough back into the bowl, cover tightly with plastic wrap, and set aside for four hours to proof.
Preheat a Dutch oven and it’s lid in a 475-degree oven for 1 hour. While the oven is preheating, use a bowl scraper (or mason jar lid) to scrape the proofed dough onto a gently floured cutting board. Gently shape the dough by grabbing the edges of the dough and pressing them back into the center with your fingertips. Transfer the loaf to a heavily floured proofing basket. Cover the basket with plastic wrap and let proof at room temperature for 1 hour.
When you’re ready to bake the bread, remove the Dutch oven from the hot oven. Remove the lid. Carefully flip the proofing basket into the Dutch oven to transfer the bread in. Cut the top with a razor blade or sharp knife if desired. Replace the lid and bake for 30 minutes. Remove the lid and bake for an additional 15 minutes until the bread is deeply golden and sounds hollow when tapped.
Remove the Dutch oven from the oven and remove the bread to a wire cooling rack. Let cool for at least an hour before slicing.