
Thankfully, our local beekeeping group knows just how overwhelming these “firsts” can be – particularly with beekeeping. In order to facilitate us “new-bees” they not only coordinated a giant group order and pickup for our bees, but also were willing to give us a hiving demonstration.
Thank you, sweet Jesus.
What followed was extremely easy, though I wouldn’t have know how to do it without these simple instructions from the bee supplier. And thus. Here I am. Sharing them with you!
Truth be told, after hiving our two boxes of bees, I wished we’d purchased even more hives! Like most beekeepers, I’ve really come to enjoy their company and their prescence on the farm. I want more to play with!
Yes. Play with bees. I know that sounds weird…
Regardless.
HOW TO HIVE BEES
Let’s suit up, shall we?

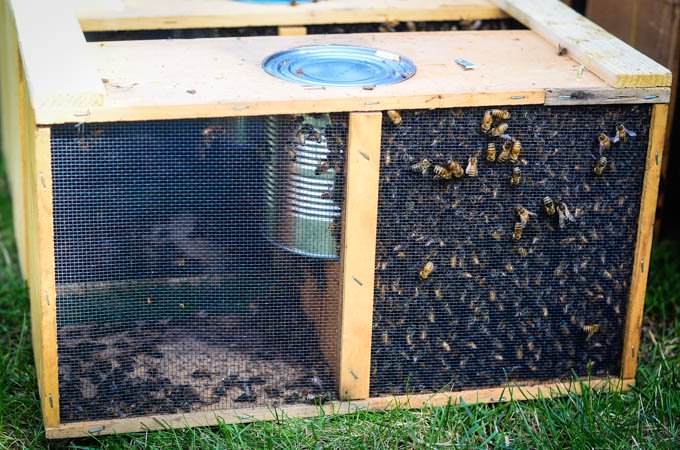
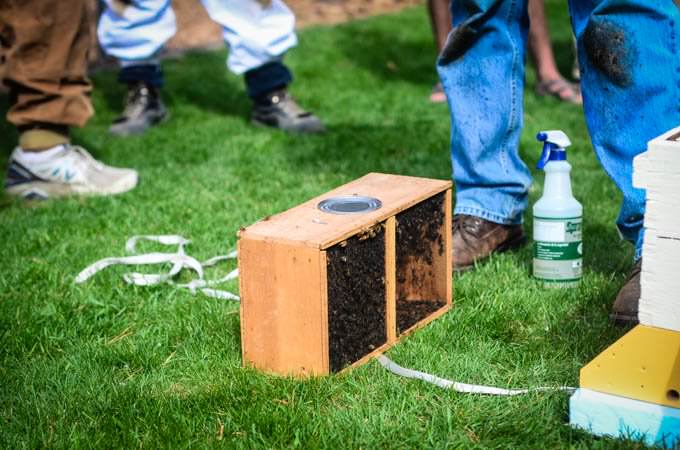
1. Acquire a box of bees. Oh. What’s that? You already did that? Perfect. We decided to start our hives with three pound packages of bees. Each three pound package, or box, has one queen. See that can on the top? That’s full of sugar syrup and is feeding the bees while they are ‘hiveless’. And see that teeny little metal clip to the right of the can? That’s the clip that’s keeping the queen attached to the box. She’s a teeny-weeny little cage of her own, inside the big cage. This is to keep her safe while the workers and drones get used to her pheromones. In a few day time, they come to ‘accept’ the queen, but until then, she remains in the separate box.

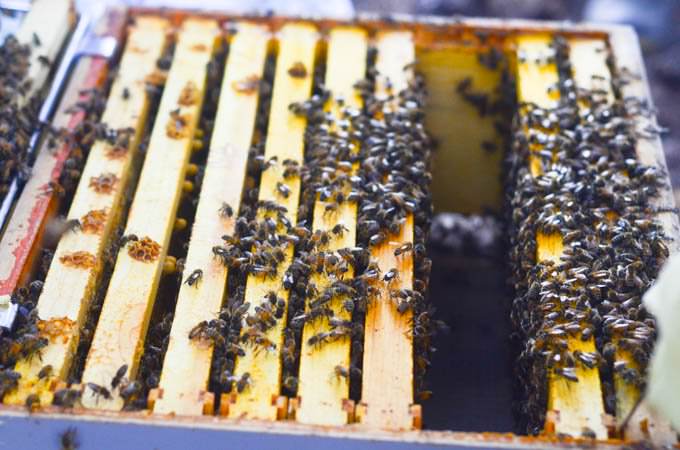
2. Prepare your hive. Is it all ready for your bees? You don’t want to give them too much space at first – it’s important that they build it up, one box at a time. We started our hives with one box, filled with 10 frames – each of which holds a foundation (here’s a great example of the set up).
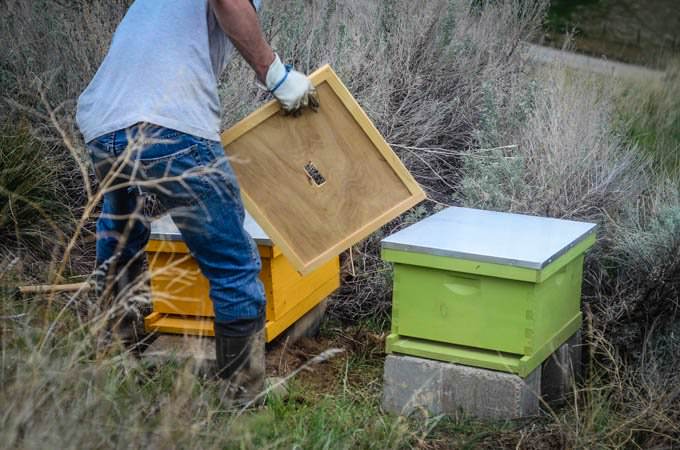
First we selected a well-protected and sunny spot that we can access easily and keep an eye on without much fuss. This spot is down by our barn, facing South for good sun exposure. It’s about 350 yards from the house and in an area we don’t mess with often. We can easily check it from the barn, where we are at least twice a day for milking. It’s also surrounded by sage, which should help with the horrible winds we get up here:

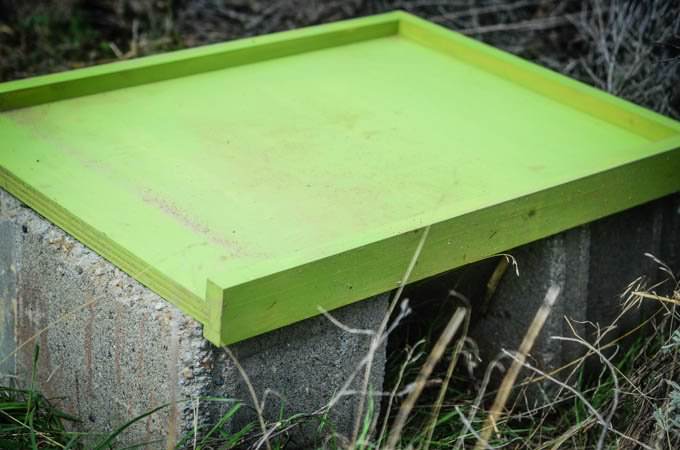
Then, we set our bottom board up on some cinder blocks to encourage good circulation around the hive and to ensure it’s slightly safer from vermin, water, etc:
Here’s the hives set up, with their top boards and lids. And my husbands backside. Ahem. *Blushing* He’s hot, I can’t help myself:
3. Now that you have your box of bees and your ready hive, let’s hive those bees! The first step is to gently spray the bees, through the box, with a 1:1 sugar syrup (one part sugar to one part water). No need to drown the bees, just a light misting. (See the bottom of the post for more directions of making sugar syrup.)
4. Slam the box of bees down on the ground 3-4 times, until the (now sticky) bees fall down to the bottom of the box.
5. Pry the tin, sugar-syrup filled can out of the box.
6. Remove the queen, still in her cage, and set her aside (a pocket is a great place to keep her for the time being).
7. Remove the lid from your hive. Remove 3 frames, so there are just 7 remaining. If you don’t remove the frames before dumping the bees in, they’ll have no where to go and will instead just pile on top of the frames – so don’t skip this step!

Dump and shake (you’ll have to be pretty aggressive) the bees (through the open hole that the removed can left) into the hive. They’ll all fall to the bottom in a giant pile. Don’t worry. That’s what they’re supposed to do! Continue to shake the bee box until you get as many bees out as possible.
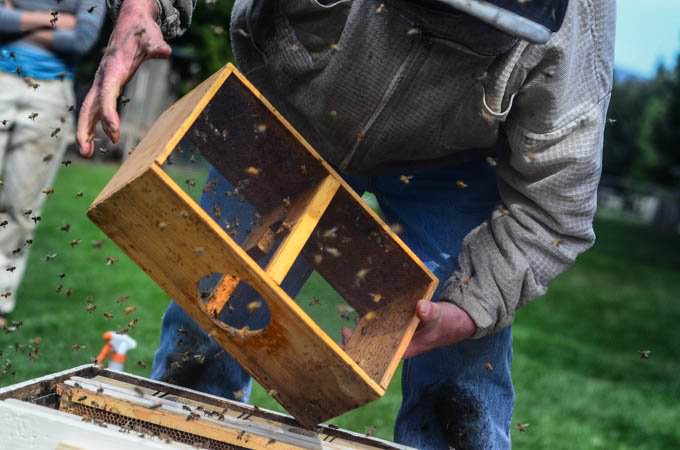
8. Gently put the removed 3 frames back into the box. The bees with slowly move out of your way. So now you should have one box with it’s ten frames back in. With the bees inside.
