It's not a secret. I don't pretend to hide it. I'm unashamed. And I wear the badge with honor. I, Shaye Elliott, am a lover of butter. Especially this homemade clarified butter recipe.
In fact, it's a huge part of the reason why I peel myself from my cozy bed at 5:15 a.m. each morning and walk down to the barn, milk pail in hand. As I *squirt, squirt, squirt* each valuable drop of that delicious, fatty raw milk into my bucket, my mind wanders to the goodness that will soon ensue.
In the form of raw milk, naturally.
And also in the form of, oh yes – you guessed right, butter.
We're a huge butter using family here on Beatha Fonn, because it's a local fat that we can produce ourselves (well, with the help of our dairy cow, Sal, of course). As much as I love coconut oil, it's not a local option for us, and while we still use it on occasion, it's nice to know that we are utilizing a wonderful, nutrient-dense fat that was literally produced fifty feet from our kitchen.
Butter, traditionally, was an incredibly valuable source of calories for the homesteader. It was a way of preserving a spring and summer bounty, as butterfat in milk greatly increases with the presence of fresh grass in the cow's diet. Prepared properly, it could keep for months and months and months in the larder – even without refrigeration. Enter this homemade clarified butter recipe.
Say what? How does one preserve butter without refrigeration?
I'm so glad you asked.

Each week, I make up multiple batches of our homemade butter, which we store in parchment paper in the refrigerator door. I love this butter. It is my pride and joy. But because we don't salt it, we usually need to use the butter up with the week for it to taste fresh (not that that's a problem for a heavy butter consuming household like ours, but noted none-the-less).
Sometimes *gasp* I get behind on my butter making and we run out. Yes, I know, it's pretty pathetic. Especially when we usually have at least seven gallons of fresh milk in our fridge at any given moment. Still, as life goes, it sometimes gets behind schedule. Because of this, I opted to try a new method of butter preservation – clarified butter (most commonly know among foodies as ‘ghee').
Quite simply, clarified butter is butter that has been gently heated to separate the milk solids, which are then skimmed off. What's left is pure butterfat and can be stored for long-term, non-refrigerated storage. Perfect for in a pinch when the fresh butter supply is short.
On top of the storage benefit, clarified butter is also deeper in flavor and color, as the white and less flavorful milk solids are removed. Another great benefit for those dishes that require an extra-buttery-kick.
The process only takes fifteen minutes and is very painless. Unless you're the butter. Which sits over a burner, and I imagine, feels quite hot.
Homemade Clarified Butter Recipe
You will need:
– Large saucepan
– Fresh butter (cultured or sweet cream are both fine)
– Large spoon, for skimming
– Storage jar
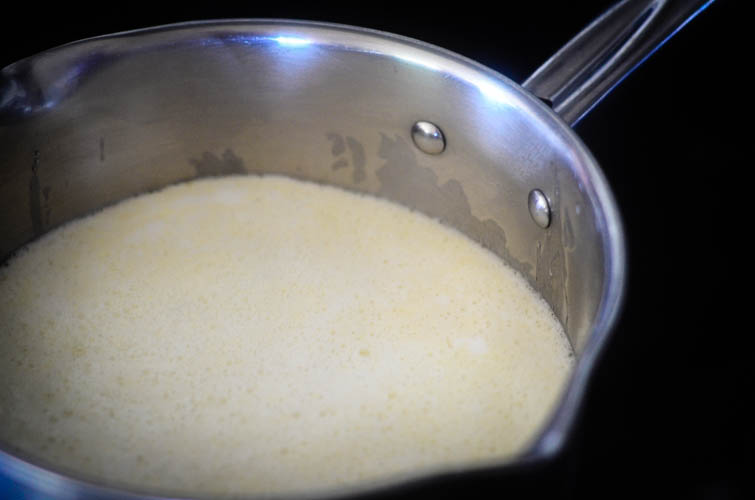
Step One: Add desired amount of butter the saucepan. Turn the heat on low and slowly allow the butter to melt. No need to rush now.

Step Two: As the butter heats, you will notice a foam forming on the surface of the butter – these are the milk solids. Skim them off.
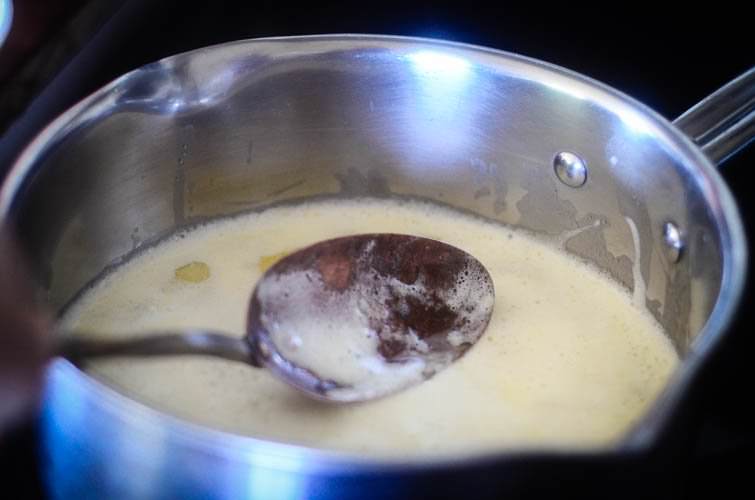
Step Three: Continue to heat the butter for 10-15 minutes, skimming off more foam as needed, until the butter remains clear. Yellow, but clear.
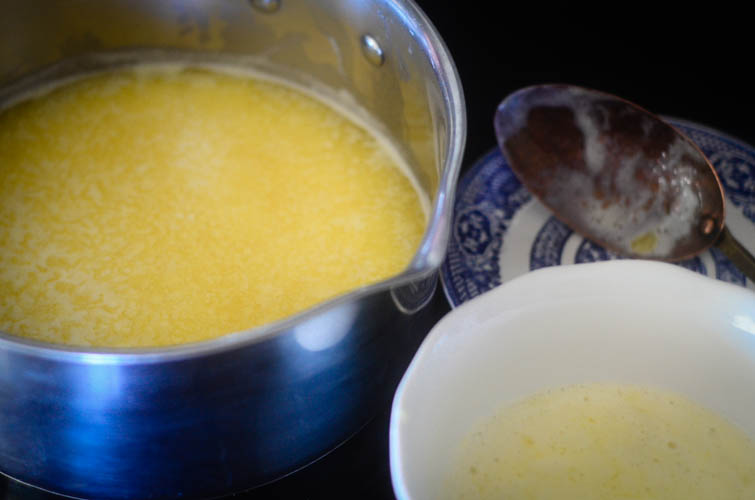
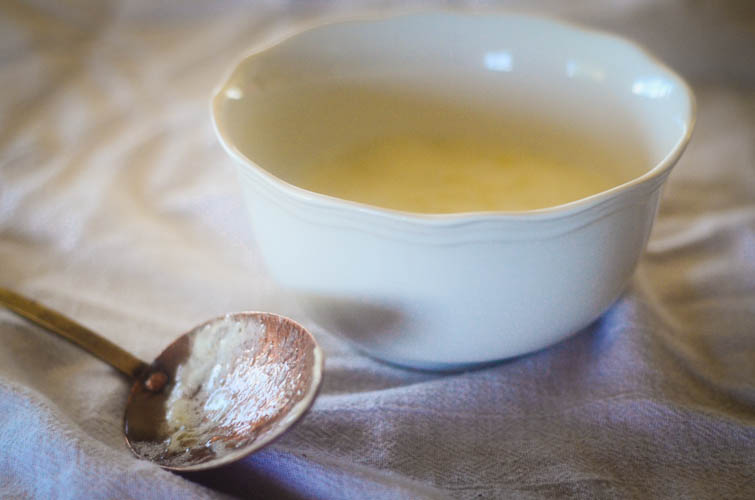
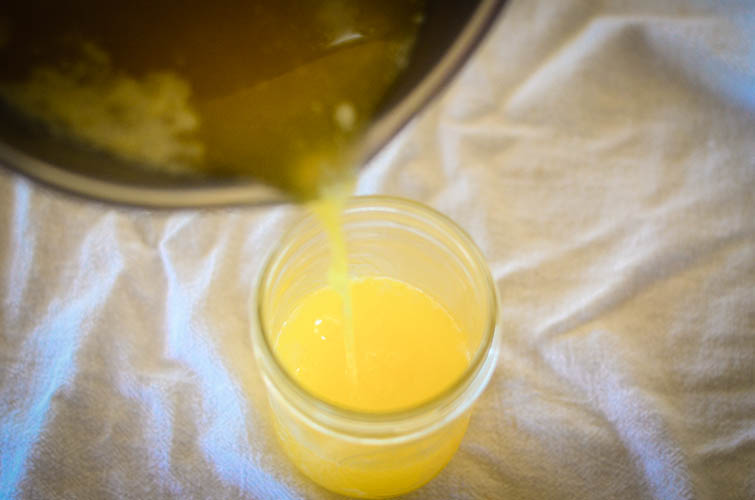
Step Four: Turn off heat and carefully pour the clarified butter into a storage jar. In my kitchen, that's always a glass jar. The butter can now be stored at room temperature for, well, a long period of time. I don't know exactly how long (ours never lasts!) but rumor has it to be years.

I love the idea of saving freezer space and utilizing this preservation method to build up our butter storage for next winter when Sally will be dried up prior to her calving. I'll be danged if I'm going to bring in butter from the store. Instead, I'll utilize what we have and be proactive in preserving a nice supply of this wonderful and naturally preserved product.
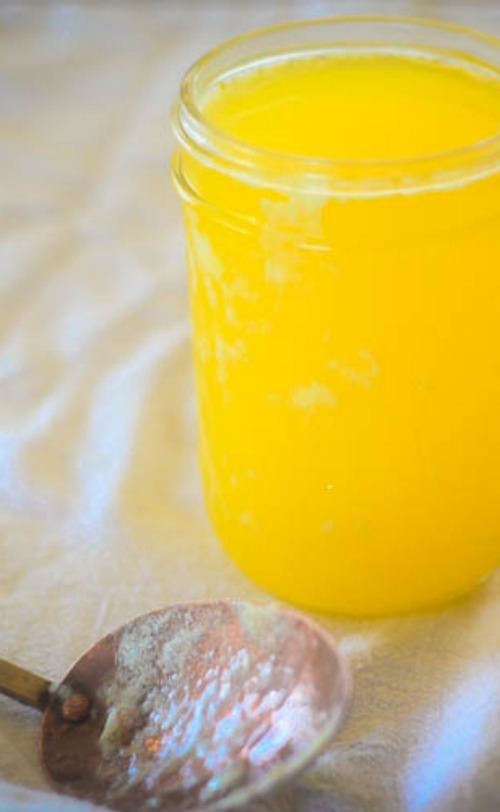
There's hardly anything more satisfying than seeing those beautiful golden jars lined up in the pantry.
I just want to… want to… smear it on my bread. And my oatmeal. And my face.
Too far? Sorry.
My love for butter knows no bounds.


Do you do anything with the solids besides them becoming pig/chicken food? I’m thinking I might need to do some ghee making for our cows dry period.
If the butter is salted and frozen it will keep a long time. I love having a stock of the deep yellow nutrient dense butter from the grass growing months in the freezer for the winter months when our immune systems are lower.
One more time, Shaye impacts my life . Oh yeah. Goodness
Ok now I have to go to spread a slab of homemade butter on my homemade bread right now! Yum!
I like the new look for the site, Shaye! Also, I wish I had a cow. 😛
Wow! Love the new look of your website. I’ve been a regular visitor for the last year but have never had the ability to leave a comment — something was always crazy at the end of the post — but now this looks great. Good job!
This is a great way to store butter. Clarified butter and ghee are fantastic for cooking as well, as they’re much more stable at higher temperatures than vegetable oils, which oxidise far too quickly and are high in inflammatory omega 6. But there is a difference between clarified butter and ghee. What you are describing here is definitely clarified butter — ghee is different in that the milk solids are not ladled off, but left cooking in the oil until they sink to the bottom and have browned/caramelised (but not burnt). Going that extra step for ghee adds a slight nuttiness to the flavour of the oil.
I have a question: I recently made some clarified butter so excited about the fact that it didn’t need to be refrigerated, but a week later the jar smelled like sour milk–not necessarily bad, just sour. Is this supposed to happen? I was wondering if it was because of the butter I use (Kalona Supernatural), which seems like it has a bit of water still in it (as in when I cut it, it weeps a little bit), would that cause it to spoil when it is not supposed to? Or maybe the cupboard I stored it in was too warm? Otherwise, when I made it, it was extremely clear and yellow and I even strained it through a cloth to make sure I got all of the milk solids out. Any suggestions would be appreciated before I try, try again!
Yep – sounds like there was still milk solids in there. The buttermilk will cause it to sour so quickly! The weeping when you cut it makes me think that’s the problem. I’d give it another go with a different brand.
Okay, thank you for the feedback, I think I will try it with a different brand next time, or maybe with my own…we’ll see 🙂
I am very new to the ghee issue. My interest hinges on two things, I love butter and as a prepper I am constantly frustrated by the short shelf life of most cooking oils. My current level of of understanding of Ghee is that it has a long shelf life! Is there anyone who knows how long that might be? I am all in on the idea of storing food for the shtf times but don’t want it to turn into a part time job rotating the stock. I love the idea that a properly put up 5 gal bucket of wheat berries will last for 30 years and have seen the tables for how long corn, oats, etc last and can deal with that but when it comes to oils it seems olive oil is the best at 2 years. Do we have any information about how long un opened commercial Ghee might last?
Love your site. mentioned you on our facebook page today. barefootin farms.
Will this work with frozen milk?
I haven’t ever tried it!
Every time I read one of your posts you make me laugh and want to start a farm immediately! 🙂
Would you be able to process the butter in jars and then water bath them to keep for a longer period? In Texas it gets warm and would hate to have in a freezer, then it go out on you. I always try to keep my things I can in a dark cool place. I have heard of others canning butter and just wondered if you could do it this way?
I’m not sure. I haven’t done that before!
I saw a recipe for making this type of butter before. It said to heat the jars in the oven on a very low temp then pour the hot liquid butter into the jar, clean the lip of the jar and put a DRY two piece canning lid on and set aside. As the jars cools you will hear the “tink” as the jars seal. Part of the heating process is also to cause the water to evaporate out of the butter….so water bath processing would give chance for the reincorporation of water. I have canned butter this way twice so far and have had no problems. The most tedious part of the process for me was the skimming part. Still worth it.
Clarified Butter Variations
Variation One:
This is from the comment section on Food Network. A reader made this suggestion to simplify the skim and strain process of WARM butter.
PROCESS:
The simple way to clarify butter is to melt it in a saucepan and pour it in a gallon size zip lock bag. Pierce a corner of the bag about 2 inches from top and side to allow string or wire to go through. I use a bent piece of stiff wire.
Hang the bag over a bowl on counter by tying it to a handle on upper cupboard door. The bag will hang at an angle forming a funnel like shape. The butter will separate into three layers.
After ten minutes snip a small piece off the bottom of bag and let the milk solids flow into bowl. Once the clarified portion starts to flow out, capture it in another container until the top milky layer starts running out.
Variation 2
This is from the site of Epicurious. Another genius approach. Use this method if time is not a factor.
PROCESS:
I’ve been doing this for years. If you don’t need to use the butter right away, skip the skimming step and just pop the melted butter into the freezer. The butter will quickly stratify then solidify within an hour. Take your frozen butter out and warm the sides of the container so the block of butter slides out easily. Use a butter knife to scrape away the frozen foam and milk solids.
by Nicodemas from Tampa, FL on 2014-11-27
That variation two sounds awesome. I will have to try that. I still want to can the butter; however, I can heat the butter after cutting the milk solids away. Sounds much better than the skimming. Thanks!
Hey Shaye, can i use goat milk to make this butter? Unfortunately i dont have a ciw and probably never will but i do have goats.
Thats suppose to be i dont have a cow. Lol
Wow, this is great to know. I don’t make my own butter, but have a question. I sometimes melt some butter to spoon over veges or a baked tater, rather than put cold butter on my hot veges. If I do not use it all it re-solidifies in the little bowl, and it separates like you have said. I usually mix it up and use it later. So, the stuff on top is the not-so-good part and the bottom is clarified butter? This amazes me!! now I can’t wait to do this again and taste the different layers, just for fun! lol Thanks Shaye!!!
Hello, I used Irish butter to make ghee. It is still warm and is watery. Will it firm up as it cools ?