Alright. So we've made whole wheat bread before. Remember? And since that post, we've changed the way we do it enough that I'd like to share our new recipe. Since I began baking bread, we have not only started to grind all of our flour fresh, but we've also started soaking all of our flour products. If you've been following my blog, you've probably got the basics down by now: soak the dough with either lemon juice, vinegar, kefir, or buttermilk to help and break down the phytates! Well this bread is a soaked bread, and thus, is super digestible. Even for those that have gluten sensitivity!
About a year ago, my Aunt taught me how to bake bread – and I haven't bought another loaf since. Homemade bread is just so good! So fresh! So authentic. And if you know where to find your ingredients, pretty cheap too!
Soaked Whole Wheat Bread
You will need:
– 11 cups of whole wheat flour (find wheat berries here!)
– 1 cup acid medium (kefir, buttermilk, whey, or 1/4 cup apple cider vinegar or lemon juice + 3/4 cup water)
– 3 cups warm water
– 2 cups oats
– 1 cup honey
– 3/4 cup coconut oil or butter, melted
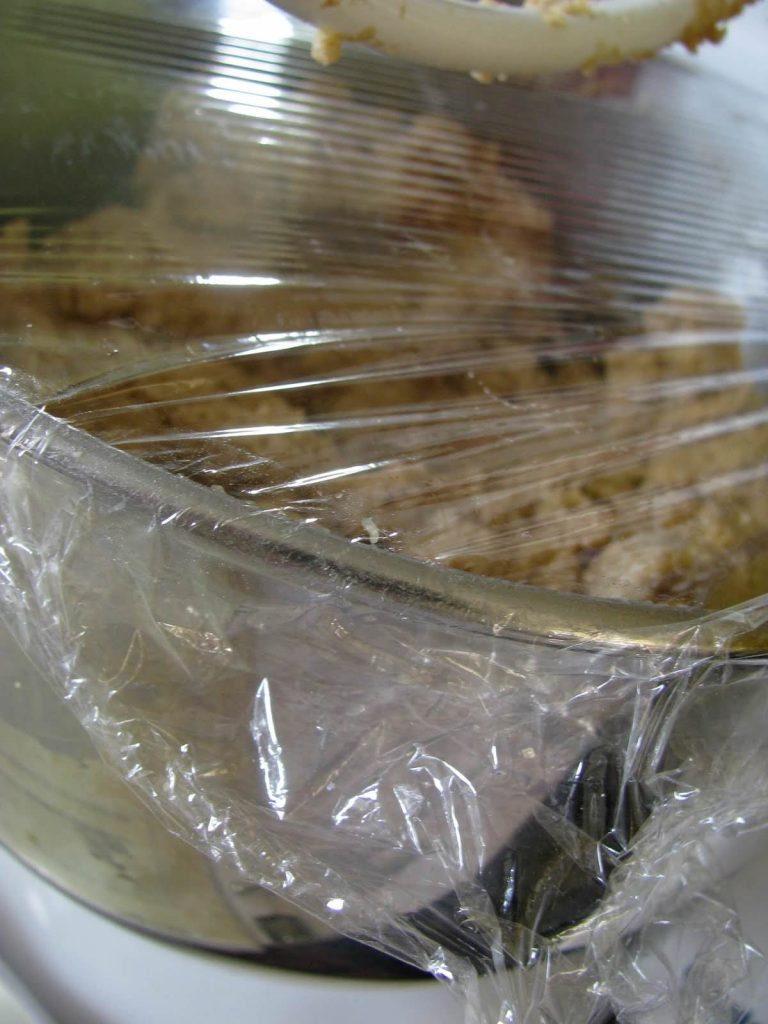
Step One: Combine these ingredients in a mixer. Then, cover with a damp cloth and plastic wrap and allow to sit out at room temperature for 12-24 hours.
Step Two: After the soaking period is complete, combine the follow in a small bowl:
– 1/2 cup warm water
– 1 teaspoon honey
– 2 1/2 tablespoons active dry yeast
Allow the yeast to “proof,” i.e.: Get all fluffy and bubbly. Usually, this takes about 5 minutes.
Step Three: After the yeast has proofed, add it to the soaked flour mixture. Mix, mix, mix. Then, add:
– 1 1/2 tablespoons sea salt
– 3 tablespoons dough enhancer (if you've got it!). I use 3 tablespoons of vital wheat gluten instead. Is the dough too sticky? Add just enough flour that the dough begins to pull of the sides of your mixer. Don't add too much!
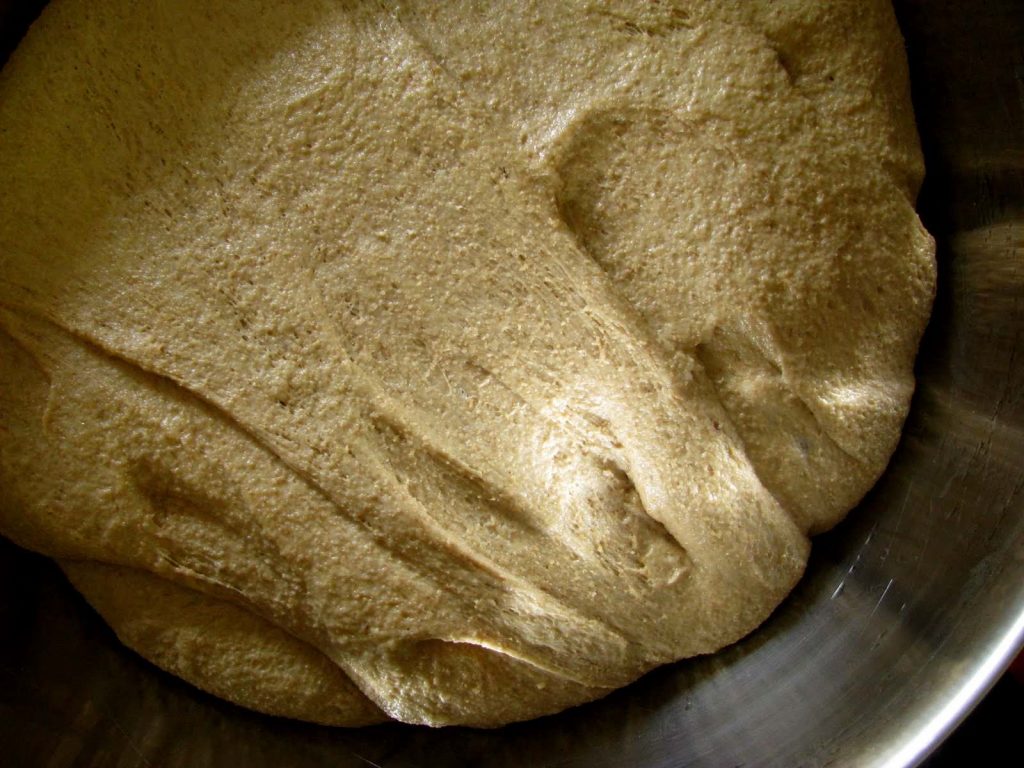
Step Four: Knead, baby, knead! Use your muscles! For about 10 minutes. If you need to sprinkle in a wee more flour to make the dough manageable, feel free to do so. After kneading the dough, place it in a greased bowl, cover, and let sit until doubled (usually about an hour or so). Punch the dough, turn it over, and allow it to rise again until doubled (thirty minutes or so).
I know this step may seem tedious, put really, it's pretty dang passive. All you have to do is keep an eye on it. And punch it. And flip it.
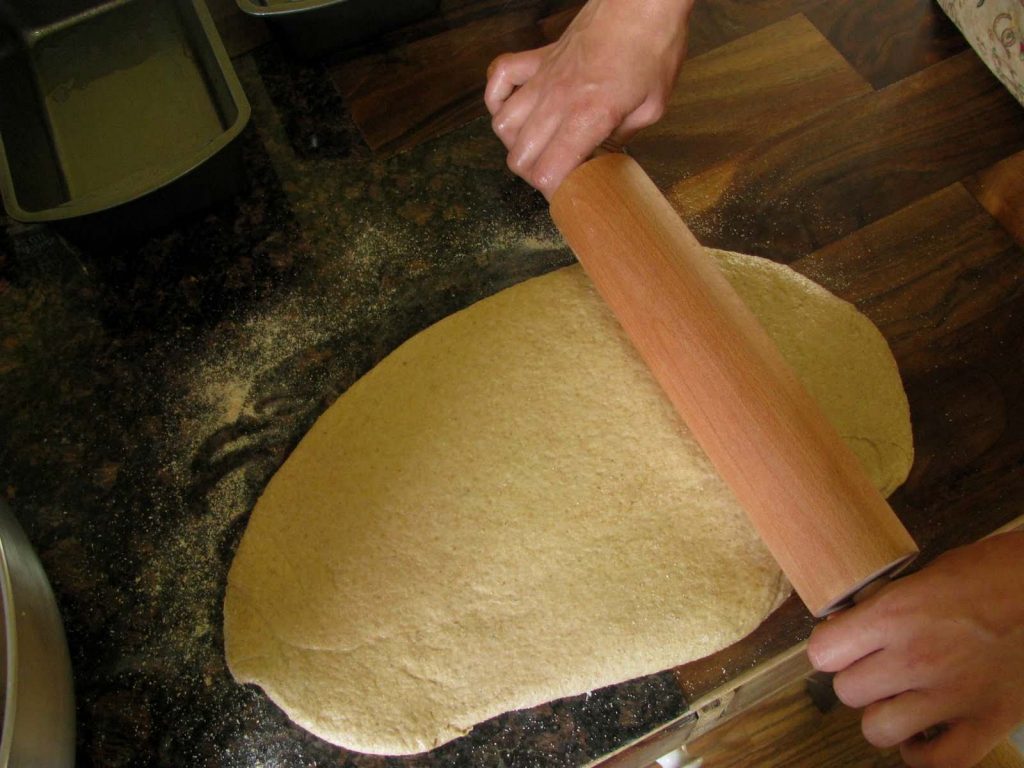
Step Five: After the dough has doubled, punch it down again, and divide it into three chunks. Using a floured rolling pin and a floured surface, roll one chunk at a time into a rectangle. Then, flip the rectangle over and roll it up like so.
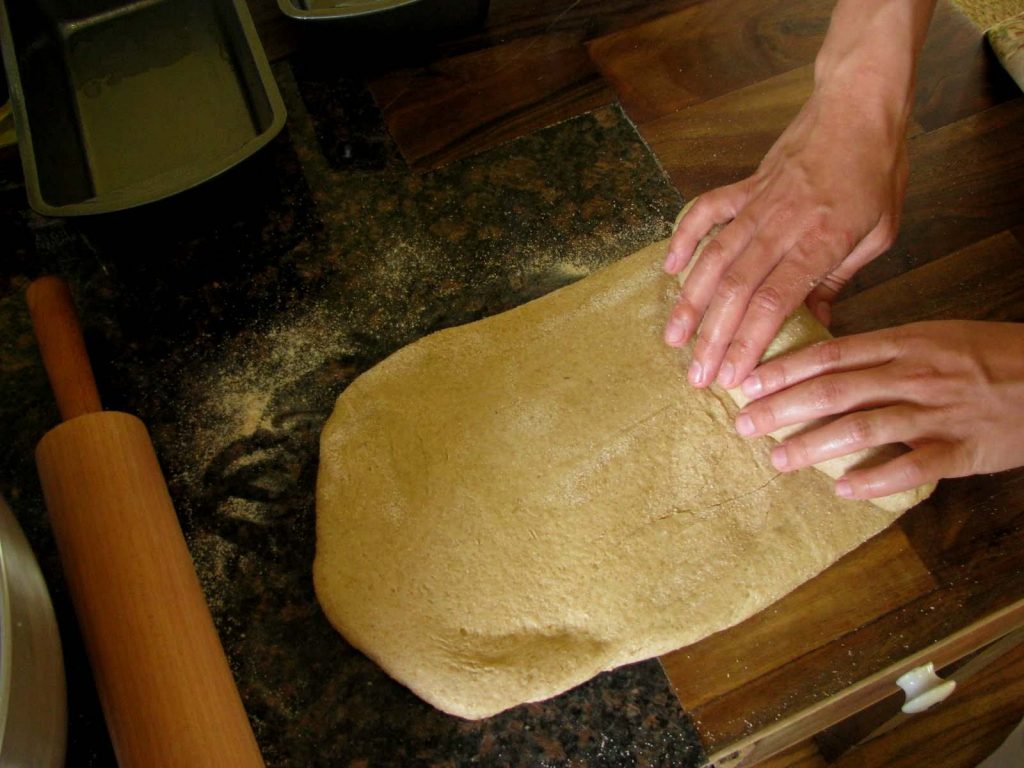
Then, tuck the ends under and place the seam of the roll on the bottom. Place into a greased bread pan. Repeat with chunk of dough #2. Repeat with chunk of dough #3.

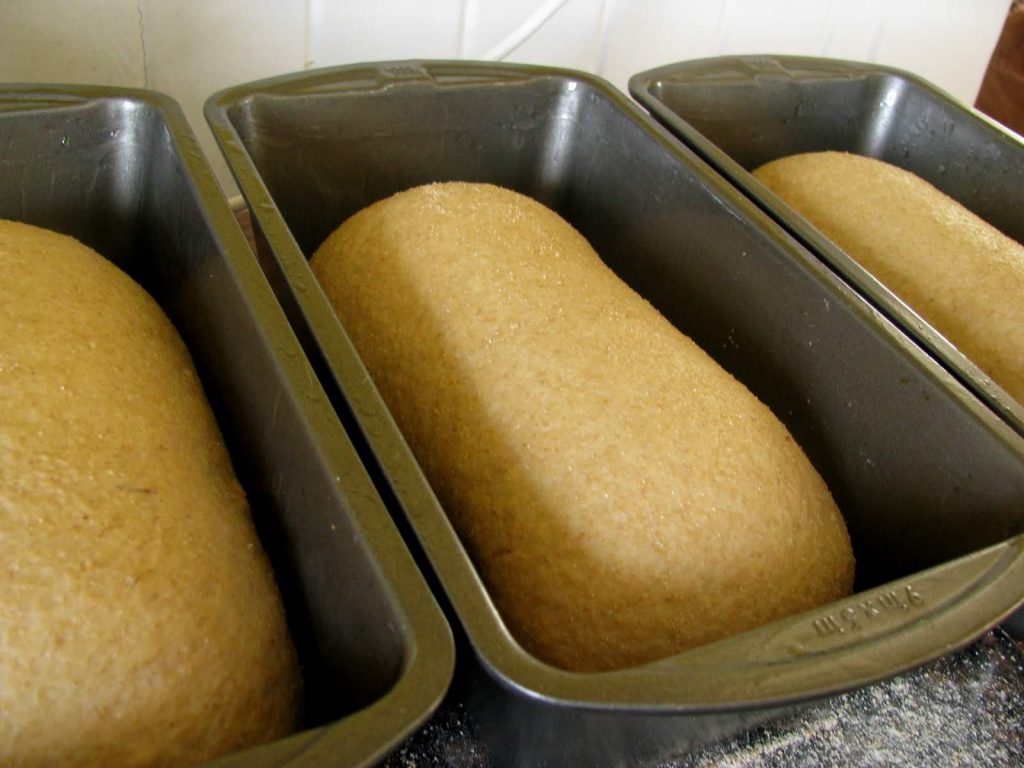
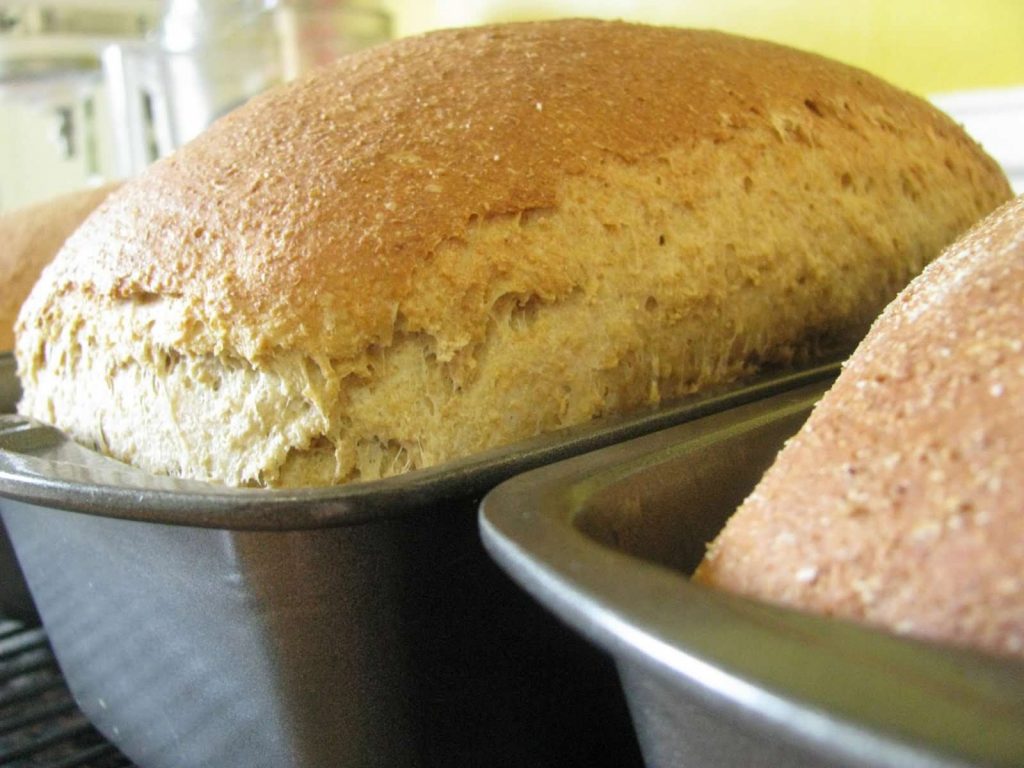
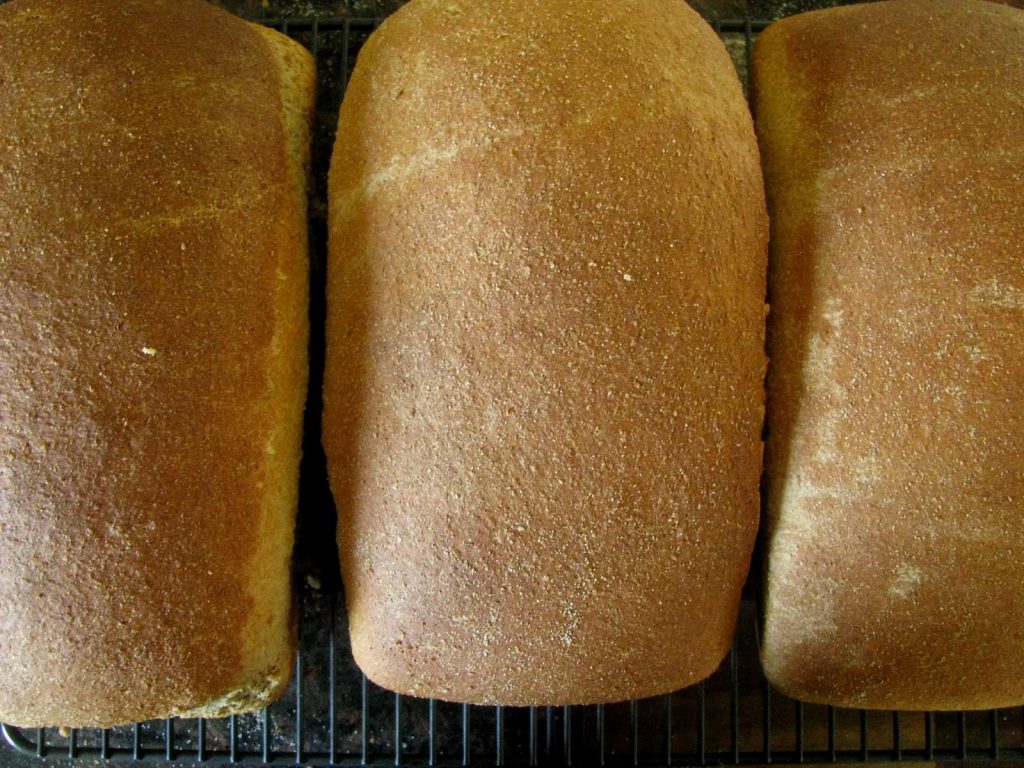
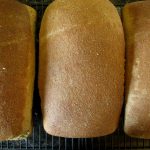
Step Six: Allow the loafs to rise in the bread pans until doubled. Then, put in a preheated 350 degree oven for 30 minutes – until nice and golden. Remove from the pans and allow to cool on a wire rack. You may have to run a knife along the edge of the pan before removing the bread so that it doesn't stick!
Bread. Tender bread. Sweet bread.
You know what this calls for?
Butter.
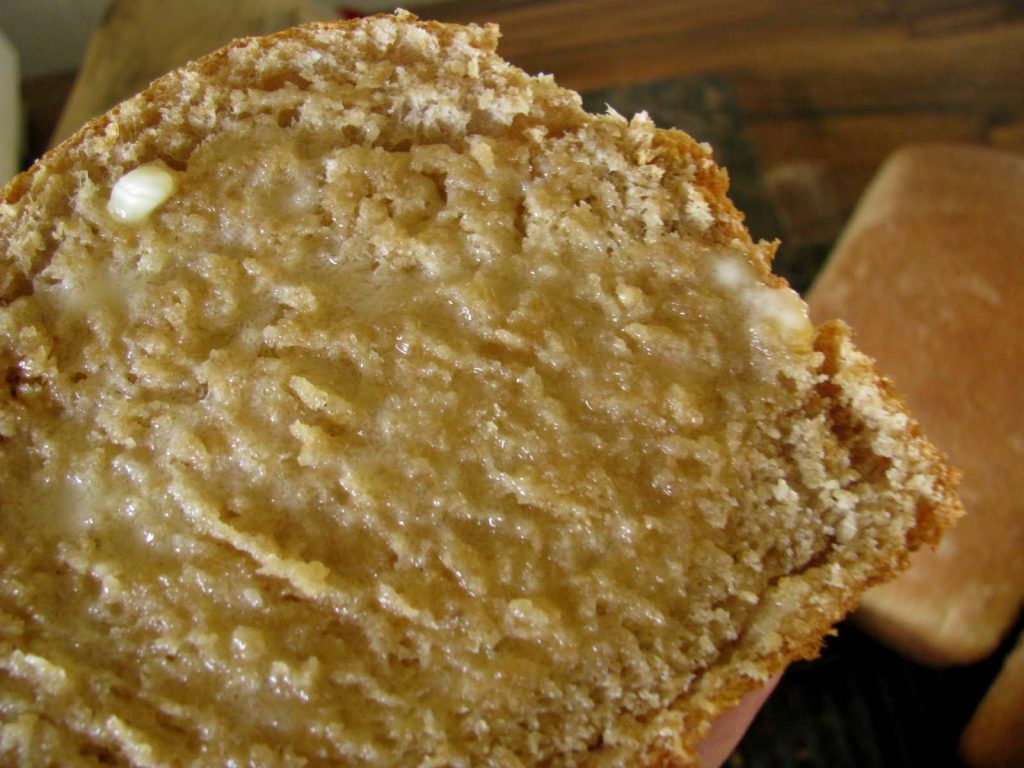
And homemade strawberry jam (thanks Mom!).
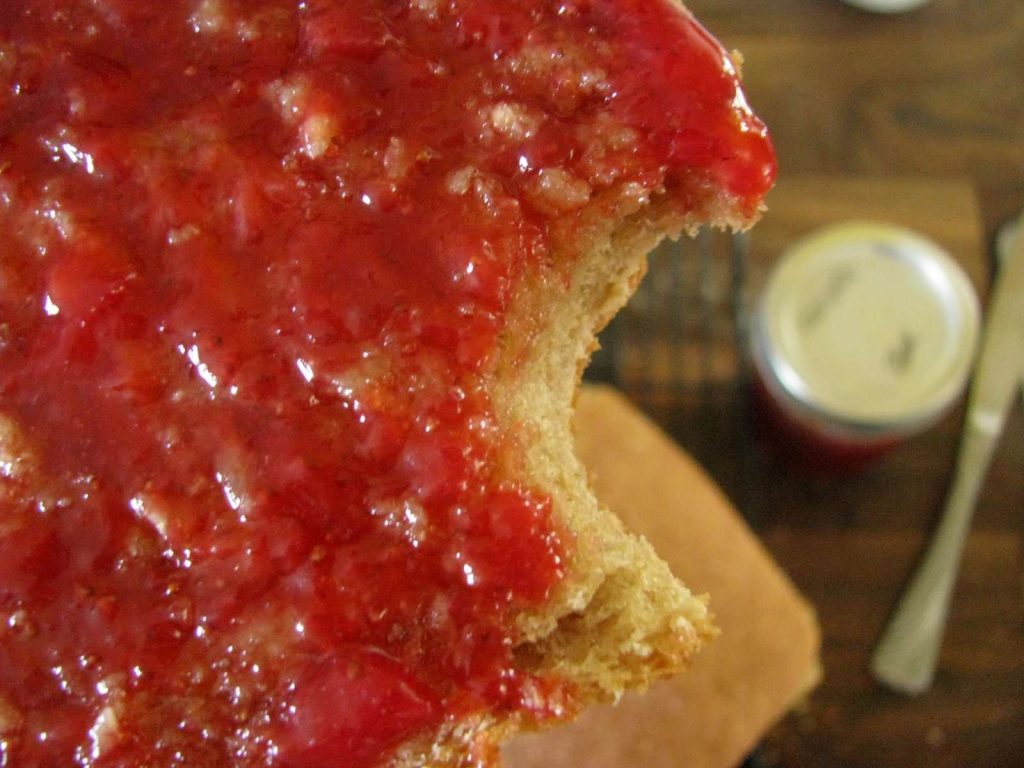
Mmm.
Here's a tip: If you won't go through three loaves that quickly, stick a few in the freezer! Wrapped in a few recycled bread bags, they freeze wonderfully.
I swear. This bread is delicious. I swear, I say!
Most mornings, we have a toasted piece of this bread, smeared with high quality butter, and topped off with a fried egg. Or a scrambled egg. Or a hard boiled egg. Or, when we're feeling rich, bacon!
I love bacon. I love eggs. I love bread.
This post is making me hungry.
Won't you try to make this bread? Please? This weekend would be a perfect time to put on your Big Girl pants and give it a go! Or Big Boy pants, should you be a, ahem, male.
Then, report back to me. Pronto. If I can help you succeed in bread making, I will! If nothing else, I would be happy to taste test for you.
I'm selfless like that.
Happy Friday, my bread lovin' friends!
For other great meal ideas, no matter what your dietary restrictions, check out the meal planning service I use: Real Plans.
Soaked Whole Wheat Bread
- 11 cups whole wheat flour ((find wheat berries here!))
- 1 cup acid medium ((kefir, buttermilk, whey, or 1/4 cup apple cider vinegar or lemon juice + 3/4 cup water))
- 3 cups warm water
- 2 cups oats
- 1 cup honey
- ¾ cup coconut oil or butter, melted
Combine these ingredients in a mixer. Then, cover with a damp cloth and plastic wrap and allow to sit out at room temperature for 12-24 hours.
After the soaking period is complete, combine the follow in a small bowl:
– 1/2 cup warm water
– 1 teaspoon honey
– 2 1/2 tablespoons active dry yeast
Allow the yeast to “proof,” i.e.: Get all fluffy and bubbly. Usually, this takes about 5 minutes.
After the yeast has proofed, add it to the soaked flour mixture. Mix, mix, mix. Then, add:
– 1 1/2 tablespoons sea salt
– 3 tablespoons dough enhancer (if you've got it!). I use 3 tablespoons of vital wheat gluten instead. Is the dough too sticky? Add just enough flour that the dough begins to pull of the sides of your mixer. Don't add too much!
Knead, baby, knead! Use your muscles! For about 10 minutes. If you need to sprinkle in a wee more flour to make the dough manageable, feel free to do so. After kneading the dough, place it in a greased bowl, cover, and let sit until doubled (usually about an hour or so). Punch the dough, turn it over, and allow it to rise again until doubled (thirty minutes or so). I know this step may seem tedious, put really, it's pretty dang passive. All you have to do is keep an eye on it. And punch it. And flip it.
After the dough has doubled, punch it down again, and divide it into three chunks. Using a floured rolling pin and a floured surface, roll one chunk at a time into a rectangle. Then, flip the rectangle over and roll it up. Then, tuck the ends under and place the seam of the roll on the bottom. Place into a greased bread pan. Repeat with chunk of dough #2. Repeat with chunk of dough #3.
Allow the loafs to rise in the bread pans until doubled. Then, put in a preheated 350 degree oven for 30 minutes – until nice and golden. Remove from the pans and allow to cool on a wire rack. You may have to run a knife along the edge of the pan before removing the bread so that it doesn't stick!


I have been making bread for years, and I haven’t ever tried this! This weekend! I’m doing this! With bacon and eggs for breakfast!
Delicious and so soft! I do find it a bit sweeter than I’d like though, if I reduced the honey to 1/2 a cup would I have to increase the other liquid? Thanks!
I love my soaked bread recipe but it never rises for some strange reason…still tastes great though (and more importantly, my husband likes it enough to eat it as well). Yours actually rise so I think I’ll be giving this one a try.
Looks YUMMY!
I’m a new follower! Looking forward to seeing what you are up to on your homestead. These loaves of bread are perfect! They look so yummy!
Thanks for the recipe!
I have made this bread a couple of times and it is delicious but I do have a problem. Sometimes the center is still uncooked and other times there is a giant hole in the center that is also still raw. Any help would be greatly appreciated.
To anonymous above – Sometimes rolling the bread will create a hole in the middle. Instead of rolling out and rolling up the three sections, try just kneading it into the right shape and “plopping” in the pan. It might not be as pretty at first, but when it rises it will round out. Hope that helps!
My daughter and I Love your blog. I’ve tried four of your recipes this week. This is my first time trying soaked bread, and it was outstanding! Finally we have a whole wheat bread recipe everyone likes! 100% whole wheat! I make the whole thing in my Bosch, kneading and all. This makes a much better loaf than standard wheat bread. I’m playing with the dough for Christmas, and my 2nd batch this week, orange cinnamon rolls, rolls, and a garlic/chives loaf for my husband’s bday. It is hard to please and feed everyone in a family of six, especially whole foods, this just made that job a lot easier! Merry Christmas!
Help! How do you do it in your Bosch? When I did it, it was very sticky and I have had to add at least 3 cups of flour to it. Also, had to take it out of my Bosch to work it. Dough smells sooo yummy! Can someone help us? Thanks!
have been looking for a new whole wheat bread recipe and like that this is soaked and makes 3 loaves. The only thing is that I don’t use dough enhancers/conditioners. How do you think this will come out with skipping that part?
This recipe looks wonderful!!! …and seeing as though you have had luck in the bread sector, have you ever made biscuits?? I’m trying to master the art and so far they’ve turned out quite flat and un-puffy. I hear it’s a pretty difficult thing to master. I’m from South Carolina and I’m currently living in Mexico City so there are a few things that may be affecting my biscuit success….1) there is no buttermilk here or cultures in which to make it and 2) I’m at an extremely high altitude!
Do you happen to have any biscuit recipes that you may be willing to share with a homesick southern gal?? If you do, pretty please share when you get the chance :0D
BTW I adore your blog!!! :0)
Kelley
I have read you can substitute buttermilk with whole milk and lemon juice. I don’t recall the ratio but you let it sit for like 5-10 minutes and then add it to your recipe. Maybe try looking it up for more accurate info…
Sour milk can almost always be substituted for buttermilk. Place 1 T. vinegar or lemon juice in a measuring cup and add milk to make 1 cup. Let stand for 5 minutes before using.
Kelly, there’s no date on your comment, so I have no idea how long ago you sent your biscuit SOS. I don’t know how to adapt for high altitude, but there are many such hacks on the internet. Here are a few suggestions about flat biscuits:
1. Make sure your baking powder is active. Pour a bit of very hot water over a spoonful in a cup. It should fizz a bit within a couple of minutes.
2. Chill everything – flour, fat, liquid, mixing bowl. Freeze your fat, if you can.
3. I’m in the South, but I make an adjustment to traditional biscuits. I get my best rise and tenderest crumb when I use all butter for the fat and add 1-3 tbl of sugar to the dry ingredients.
4. Mix your dry ingredients, less 1c flour. Set the extra cup aside.
5. If you have a food processor, put the mixed dry ingredients in the workbowl and grate your butter onto the top. If no processor, grate the frozen butter by hand and put atop dry ingredients. Gently stir until butter is distributed, then gently stir in soured milk or buttermilk. It should be a sticky, gooey mess.
6. Sprinkle 1/4 reserved flour on surface. Plop dough on top and sprinkle with 1/4 c reserved flour. Flour your hands and gently pay and fold the dough. Sprinkle with 1/4 more reserved flour and fold again. Pat, sprinkle and fold once more. Pat dough 1/2″ – 1″ thick and cut, being careful not to twist cutter. Don’t overwork your dough. This makes them tough, hard and flat.
7. If you like crispier sides, don’t let biscuits touch each other on baking sheet. If you want tall, fluffy and soft biscuits, let them touch on the sheets.
8. Brush hot biscuits with butter before removing from the sheet.
Hope this helps!
I just made this and let me say. A-MAZING! I am pretty sure that when I step through those pearly gates in heaven that I will be handed a hot loaf of this bread and a crock of butter!
Thanks for sharing this yummy recipe!
The secret to great biscuits is to use real butter… and to keep it as cold as you can. Try letting it sit in the freezer after cutting it up and again after cutting it into the flour. It’s those bits of cold, unmixed butter in the batter that make biscuits fluffy.
I learned to grate frozen butter directly into the dry ingredients. Works like a charm!
How did you mix this – by hand? It is sooo thick (moist by thick) my kitchen aid can’t even handle it. I let the kitchen aid get it mixed a little and then took it out and used both hands to mix it like I would hamburger. Is that how it is supposed to be? It already smells divine!! Can’t wait to finish it. Donna
We tried this recipe today and LOVED it! I have put it in our family recipe book! Thanks for sharing it. Our pans must be alittle smaller than yours, because we were able to get 4 loaves out of it. We have 11 people in house right now and it’s ALL gone! So we have another batch “soaking” to make in the morning. 🙂
Can you tell me what type of wheat flour did you use-red or white?
I use white wheat!
I made this, and it was so crumbly. Good, but too crumbly for sandwich bread. I didnt use dough conditioners, would that fix it? Would kneading it more change the crumbliness?
The vital wheat gluten, I’ve found, is essential to keep it from being so crumbly.
Ok, how is it that I stalk, er I mean, follow your blog and I didn’t see this Post of Utter Deliciousness? I found it on Pinterest instead!
So I have acoupla questions:
Numero Uno: if you have used both the lacto-soaking juice and the non-lacto jucie (not at the same time, of course!), have you found there to be a difference in flavor? I presently have no buttermilk, yogurt, OR kefir. It is, indeedee-oo sad day in the Faulkner household. But! We have the ACV (it’s raw…wonder if it’s potentness would be a flavor factor?) and lemons!
Numero Dos, or however you spell it: what kind of grain mill do you have? We have the Family Grain Mill, which is a hand-crank, but just got the company’s attachment for our Kitchenaid, so grinding goes a smidge faster. The thing is that this mill doesn’t give you that darn-near store-boughten flour texture like the Nutrimill. I was wondering what you had and if you thought that the difference would impact the numbers of the recipe.
Sorry about writing a small book here!! Yikes!
I’ve made this several times substituting butter for the coconut oil, because I haven’t had any on hand. Last night I made it using the coconut oil for the first time, from a brand-new jar that I tasted as I used it.. and the bread now tastes like rancid coconut oil. It killed me to feel like I wasted all that otherwise delicious-looking bread! Did I do something wrong?
Also – @ dcwes – I usually used regular whole wheat (no conditioner) and it was crumbly but dense, you’d have to use 3/4″ or greater slices for a sandwich. Yesterday’s batch was the first time with whole wheat bread flour, and I felt like it rose better and held together better. But either way I felt like I needed to lightly toast the bread to make it stable enough for a sandwich. I think a melted slice of cheese would make perfect bread-glue.
I’m not knew to bread baking but very new to grinding our own wheat. I’m excited to try this as I’ve been getting more bricks than actual bread since my mill came into my life. Love the idea of using our kefir. Wish me luck!
Made a new batch today and it was absolutely PERFECT! The kids are devouring it with cherry preserves. This will be my everyday bread from now on! Thank you for a successful recipe.
Is it possible to use a lot less honey? And if so, what would I use to substitute
This comment has been removed by the author.
Where in the world do you get dough enhancer?
a health food store? we have a little local shop owner who makes her own bread so she sells things like that….
KarenL
Krista, I use ‘vital wheat gluten’ from my local health food store.
I ended up getting mine in the natural foods section at Fred Meyer. You can also get it on Amazon 🙂
I just made this bread and unfortunately all the loaves came out raw in the middle (even thought I checked it with the fork which came out dry). 30 minutes was definitely not enough for baking time.
Tap on the bread and listen for a hollow sound to hear when it is done. If it doesn’t sound completely hollow then leave it for a 2 minutes longer and keep tapping. Hope this helps.
30 minutes might be acceptable for a convection of but not a regular. I would stick an oven thermometer in your oven to make sure it reads 350 when dial is set to 350. Plus you can stick an instant temp thermometer into the center of the bread. It should read 190 when bread is done.
My Grandma taught me to make bread, she said don’t take it out of the oven even if it looks brown on the top, until you wet your finger and touch the bottom of the bread pan and it sizzles. You won’t burn your finger if you wet it and just touch it fast. I do this all the time and I have not had an under cooked loaf of bread with this method.
Is this meant to be mixed by hand because as the reader up above mentioned my Kitchen Aid could not begin to handle it. Also, I am not finding that it is rising to double the size after 1.5 hours. The dough smells great so am hoping for the best! Will post later to let you know.
I have my large bowl holding the dough for its first round of rising. I mixed it by hand and kneaded it with love. I think that has got to be my favorite part of bread making, the kneading and the lovely rhythm I get into.
I couldn’t help but add some sunflower seeds, flax and wheat germ with the oats. Do sunflowers seeds require a different soaking method?
Thanks for sharing, and I am looking forward to trying out your updated version as well. Keep posting!
you metioned that this bread is ok for people who are gluten intolerant and this is because of soaking the dough. then you add vital wheat gluten. doesn’t that negate the soaking to make it gluten tolerant? i really want to try this . it sounds great but am afraid to. i am gluten free. please reply.
The vital wheat gluten is optional, though it does help the bread to hold to together (as gluten does). I also have another ‘Traditional Soaked Whole Wheat Bread’ recipe in the Recipe Index that is a more basic soaked bread recipe (no wheat gluten necessary). Neither bread is gluten free, but the gluten is broken down and made more digestible by the soaking process. Hope this helps!
Thanks for the awesome recipe! We’ve been slowly making the switch to “real” food, and I was in need of a good bread recipe. Just wondering- have you tried freezing any of the unbaked loaves?
I have discovered that when you add a crushed Vit-C tablet too, it makes the dough rise nicely.
can i use multigrain bread flour instead of whole wheat flour?
How do you think it would affect the final product if I substituted flaxseed meal for some or all of the oats?
Hmm…I’m really not sure. I’d say give it a try!
I altered this to make 2 (5×9) loaves -which is the most my kitchenaid can handle at at time. Love it! I’ve been making my own bread for about 8 years (grinding berries for about 1 year), but only in the last few weeks learned about soaking/spouting grains. Thank you soooo much for sharing your process and recipe.
I use olive oil instead of coconut or butter. My husband complained today though that the bread seems too dry. Do you think using butter (I’m afraid to have the bread taste like coconut) will make the loaf more moist/soft? If I add more water then I just have to add more gluten so I don’t image adding more water is the solution. Thoughts?
Maybe it was overbaked? I’ve had great results using butter…so maybe try that?
I hope I am not out of line by adding my two cents worth. But I have found that the fresh whole wheat flour is a thirsty flour, another reason soaking the flour is a good idea. But along with being careful not to over bake try to back off on the flour a bit. Don’t add flour to the point that you would a white bread dough. Make your whole wheat dough softer, quite a bit softer. I know it will feel strange but I think you will enjoy the results. Make a test loaf and see what you think.
Thanks Patch! I am soaking more dough tonight, will add extra water in the morning mix. Loving these new, simple health improving techniques.
You say “cover with damp cloth & plastic wrap, yet I only see the plastic in the picture… wondering what to do? Thanks! 🙂 Trying this tonight…. yikes. ha ha!
I had a similar question. I ended up not using a damp cloth and just using the plastic wrap to make sure moisture couldn’t escape. I think it worked- I am just about to put it in the oven, so I haven’t taste tested yet, but it looks great! Good luck tonight. It was really quite easy.. long, but easy.
Ok, I failed. I have made bread before and never failed this miserably, so HELP! My bread came out totally hollow… like 6 inch tall loaf of bread with really only about 4 inches of bread- the whole length of the loaf. Any ideas what I did wrong? Did it just not fuse well when I rolled it? Secondly, mine was not anywhere close to cooked all the way. I am guessing I should have just cooked it longer, but how do you test it? Mine was quite dark on top after cooking the 30 minutes, so I assumed it was done.
Vanessa, try this one: https://theelliotthomestead.com/2012/08/traditional-soaked-whole-wheat-bread/
I made this bread! It is so yummy. Only difference was I used white whole wheat. I had to add extra yeast because I didn’t really know how to proof it, so I was kinda worried it would come out wrong. It didn’t!! I made two loaves and 8 mini loaves for dinner rolls. I *might* have had one of those as soon as it came out of the oven with butter and homemade apricot habanero jelly. I also happen to love butter. And eggs. And bacon. Thanks for a great, easy, soft whole wheat bread! Let’s see what the kiddos think in the am 🙂
3 gorgeous outside, gooey inside loaves after all that work & ingredients! Ahhhh! Any ideas what went wrong? This has never happened before with my non soaked recipe. Help!?
Dangit! I hate it when that happens! Here’s the new recipe I have been using. I’ve never even had anything close to that happen with this one. And it’s easier, too.
https://theelliotthomestead.com/2012/08/traditional-soaked-whole-wheat-bread/
I tried to go there and it says page not found
That was my fault. Sorry. https://theelliotthomestead.com/2012/08/traditional-soaked-whole-wheat-bread/
Try again 🙂
Just found your great site – really enjoying it! I just made this bread recipe today but I’m having trouble with the bread rising – this seems to be a problem I consistently have. What brand of yeast do you use?
Errr…not sure. I bought in bulk awhile ago and just store it in a mason jar in the freezer right now. I want to say it’s like SMP or something like that. It’s got a little cartoon guy on the front. Is your house cold? That may be part of it. Drafty houses can really affect bread.
I always want to cry after I attempt to bake bread. I thought after seeing this step by step, I couldnt go wrong. I was optimistic. I smelled every step. The house was excited…horrible complete fail. First, after the 24 hour soak the dough was so dry the kitchen aid would have been destroyed had I used. Finally added a bit more water by 3/4 cup. Kneeded dough for 10 mins. Rose. Punched. Rose. Punched. Rolled. Pans. Doubled and still wasnt even half the height of the pan. An hour later the dough is about 34th to the height of the bread pan. Cooked for 350. 30 mins. Bread a pathetic level of the bread pans and raw in the middle. I ground my flour. Soaked. And everything even the added gluten. Boo wish I understood where I keep going wrong.
Marie – try this one before you give up: https://theelliotthomestead.com/2012/08/traditional-soaked-whole-wheat-bread/
Did a lot of math, & realized I could use this recipe in conjunction with my leftover Easter egg dyes. Just the 1/2 C water, 1 T vinegar & 20 drops of food coloring mix. Made 6 loaves of rainbow bread. Thank you for this recipe. Seriously, though. A LOT of math was involved, but it’s pretty & yummy.
Hi, I soaked this dough lastnight and today when I uncovered it, the top layer of the dough was a dark grayish color. The rest of the dough looked fine. Has anyone had this happen? Is the dough okay for bread? I did use the damp cloth and plastic covering it over night. Thanks.
That’s totally normal – don’t worry about it!
How do you mill your own flour? What do you use? I’m super impressed with your homestead-self!
First of all…delicious bread and easy to follow recipe. Thanks! Mine just came out of the oven and my daughter and I are enjoying it hot with butter 🙂
However, I made the three loaves and they are massive! They did not cook very evenly that way, so next time I will make it four.
This bread is delicious. I divided the dough into 6 loaves and they cooked evenly. I will be making these again. Thank you for sharing your recipe!
I loved the step by step directions and pictures, they were very helpful. I think I am most excited that you could do this ONE day of the week, and have bread to last a week. (We have 4 people in our household.)
Do you have a flour mill you recommend? Love your site…loads of great ideas!
I tried this recipe yesterday and it turned out quite good. I dd have one problem though. There is a hollow cavity in the middle of my loaf. My hunch is that this has something to do with rolling the dough for the loaf. Any experience with this?
If you didn’t punch the dough down thoroughly after the first rise that can happen. It can also happen if you let it rise too long before going into the oven. The air bubbles were large and only got larger when they his the heat of the oven.
I’m wondering if anyone has tried making these (or another of the bread recipes) into burger buns. I’m pretty new to baking bread, and I’ve had great results from this recipe as well as the ones from “From Scratch” and I want to try making burger buns. Any tips? (Would it work to shape them into wide, flat rolls and put them on a cookie sheet for the last rising instead of into loaf pans?)
Ok, so I am sooo bummed. I was so excited to try this yummy recipe and when I went to check if my dough had rose for the first time after an hour and it was still as heavy and dense as it was when I first put it in the bowl. It never rose. So sad. I followed everything exactly except for I didn’t have vital wheat gluten. Would that have made a difference? Any suggestions? By the way I LOVE your blog. I am just starting to discover this way of cooking and living. I dream of having a milking cow and chickens. Reading your blog is very inspirational!
It sounds like a problem with your yeast. Was it old?
Yes! I ended up checking it after writing this message and it was. I threw it out and now I am going to give it a try again tomorrow. I am so looking forward to this yumminess! Thanks again for sharing your adventures. I look forward to your posts all the time.
OH MY GOSH!!! Sooooooo delicious! Just had my first bite. With some amazing “super butter”! Heavenly!
I cannot wait to try this recipe. Do you have a preferred acidic medium for the best flavor?
I like buttermilk or vinegar best.
Quick question…..I typically make grain free pancakes but sometimes my family likes good of fashioned wheat pancakes and waffles. I was thinking I should soak my flour first when making them this way. My question is if I still need to use a whole T of acidic addition for whatever measurement of flour I need?
Yep – that’s usually pretty standard. One tablespoon of acid medium per cup of flour.
A few questions as I am a newbie. How do you store your excess wheat berries when you buy them in bulk? What would you recommend to use to grind the wheat berries into flour? The fanciest things I have are a blender and a small food processor…
Leah, I store mine in airtight, food-grade, plastic buckets with sealed lids.
I’ve dabbled in bread making off and on for 40 years, the last 13 using only a bread maker. I have to say this is the best tasting-easiest to do without a mixer-bread that I have EVER made! Thank you so very much! I am hooked!
Where do you buy your grain from? In bulk? Thanks
Azure Standard.
So I was just wondering? What kind of berries u shud to grind? Hard white, hard red??? Also I have a bosch is it possible to use that instead of kneading by hand??
I use hard white or hard red for bread baking. And yes, you could use your Bosch!
I’ve made this bread three times and my family loves it. It is great as sandwich bread, toast, I don’t buy bread anymore. I use a thermometer and pull the bread when it reads 190 degrees otherwise yes on regular bake 30 minutes is not enough time. But that’s how the pros do it anyways.
I have tried several different bread recipes and all of them I had trouble getting them to rise. I was so happy to find this recipe I did every step didnot change ànything ďid not hàve to add any flour to it baked it for 30 min. and it turned out AWESOME thanks. We have toaster it made sandwiches with it and have just eaten it with butter. I finally ģot a whole wheat recipe that works. this will be my go to recipe from now on.
Made this today with hard red wheat and it is a game changer! Fabulous! Thanks so much for the post. This will be my go-to from now on!
Awesome! Way to go!
Do you have the nutrition information on your Soaked Whole Wheat Bread? (Calories and nutrients)
This bread is so delicious and I divided the recipe into a third and make it in my bread machine about once per week for my husband and myself.
Thanks,
Jackie
I’m having an issue with sometimes the soaked dough doesn’t get completely incorporated into b the final dough, even when mixed and kneaded well, and then they are hard flour chunks in the dough