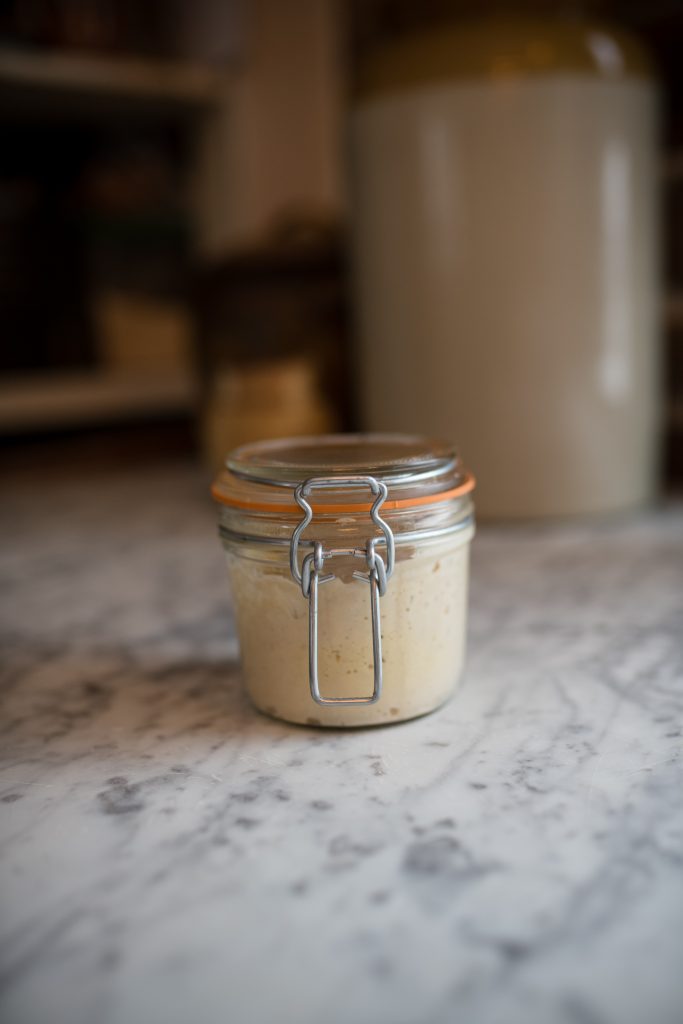
I keep a sourdough starter. A very healthy one. Right now, a small jar of my starter is living in the refrigerator where it sits, waiting for its moment in the sun. “What will I be?” it wonders. “Maybe English muffins? Bagels? Focaccia? Oh the possibilities!”
I bake almost every day with my sourdough starter, but I only feed it once a week.
If you've ever baked with sourdough before, I hope you’re intrigued.
ONCE. A. WEEK.
Ever since I learned to utilize a “stiff” or “dry” sourdough starter from Carla at Jovial Foods (that was years ago now), I’ve become a dry-starter-sourdough-evangelist. Let’s talk about it.
The Problem With Wet-Starters
Any sourdough baker will tell you – especially if they’re a beginner sourdough baker – that maintaining a sourdough starter is probably the hardest part of the entire process.
Feed in the morning.
Feed at night.
Feed more the next morning.
Feed more the next night.
Watch it explode out of the jar.
Take starter out.
Make something with it? Throw it away?
Feed some more.
Why does it smell like that?
And on and on the cycle goes. I’m not saying it’s bad – I’ve kept a wet starter before, happily. I was best at feeding my wet starter when I was also nursing babies and kept to a stricter schedule: feed the baby, then the sourdough. And while the labor involved with a wet sourdough starter is fairly minimal, it’s also hard to remember to do anything twice a day. Or even once. More than a few times, my wet sourdough starter got stuffed in the cupboard and sat – unfed – for days on end. The result was an unhealthy starter that, how do you say, failed to thrive. And in order to revive my weak and wet starter, I would have to feed it for days before it would rev up enough to bake with it. Which basically made me spiral into a baking-guilt-cycle:
I love you wet-starter!
Sorry for forgetting you for days.
I love you again! Come back!
So sorry. I did it again.
I’m a decade into my sourdough baking and I’m simply here, being a dry-sourdough-starter-evangelical, telling you there’s an easier way.
The Easier Way To Keep A Sourdough Starter
I could use a lot of words (and I want to) but I’m really trying to refrain for the sake of clarity. I want you to realize just how simple this method of keeping a dry-sourdough starter is. Instead of keeping a large jar of wet-starter that needs to be constantly fed (most wet-starters are kept at 1:1 flour/water ratio), I advocate instead for keeping your starter at a 2:1 flour/water ratio. That may not sound like a huge difference, but to our natural yeasts, it is. On top of the new feeding ratio, a dry-starter starter is also kept in small amounts. When one wants to bake anything with their starter, a small piece (think a large pinch… about a tablespoon), is removed from the starter. It is then fed a 1:1 ratio of flour/water at that point and allowed to rev up for a few hours before baking.
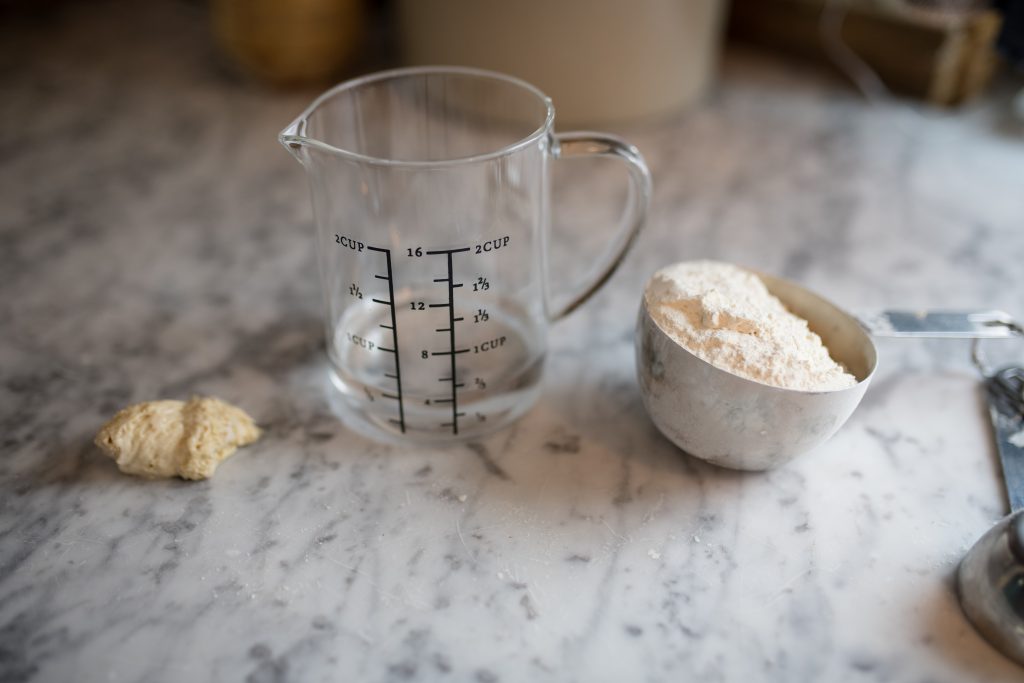
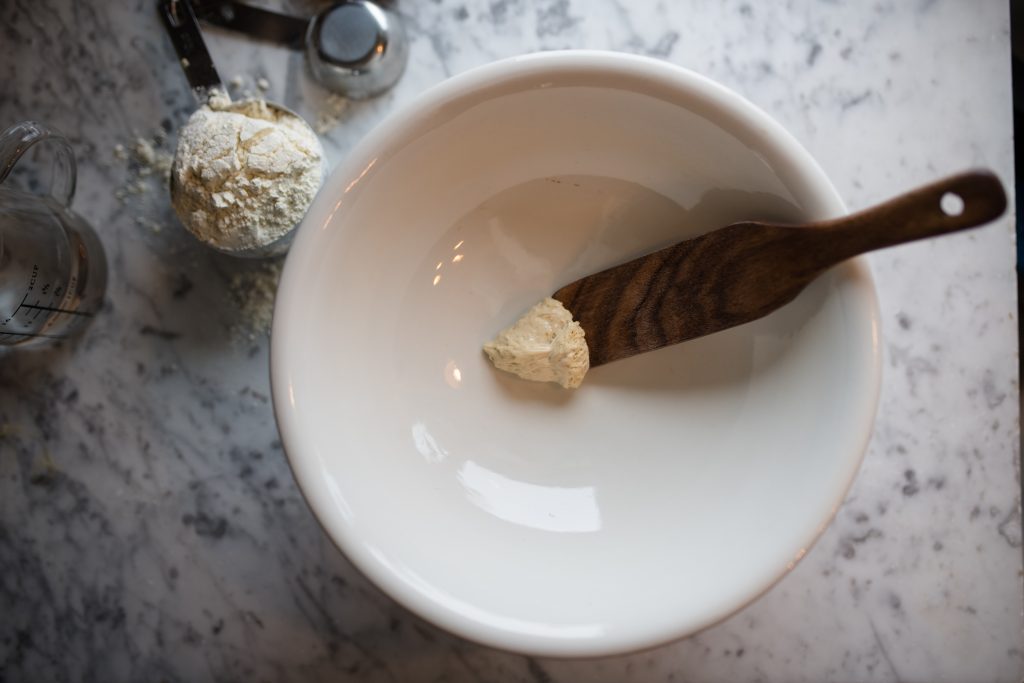
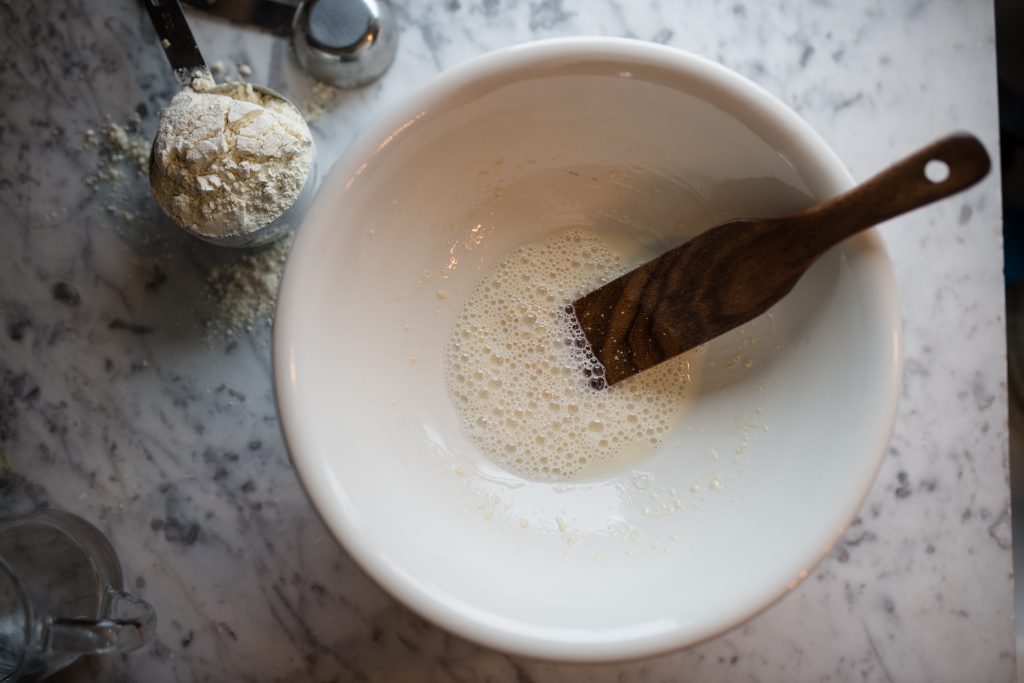
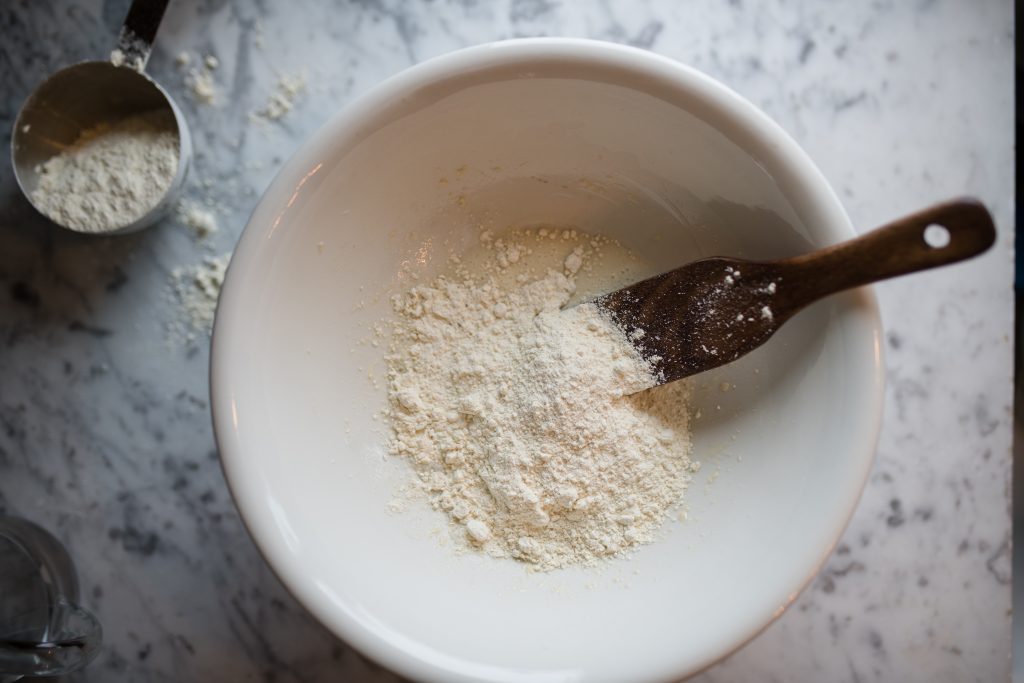
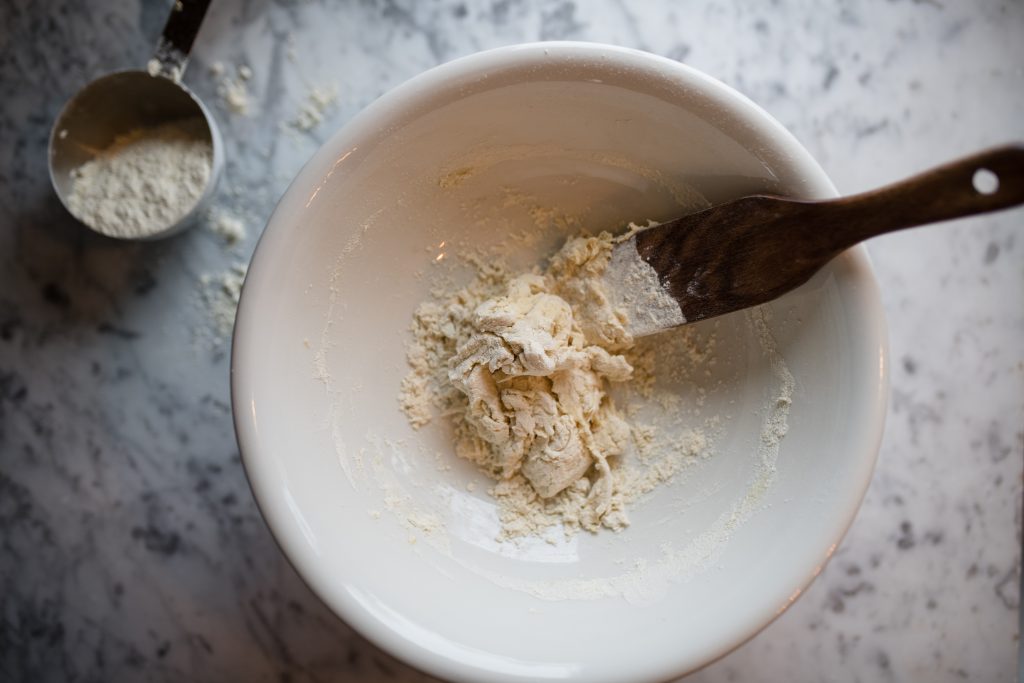
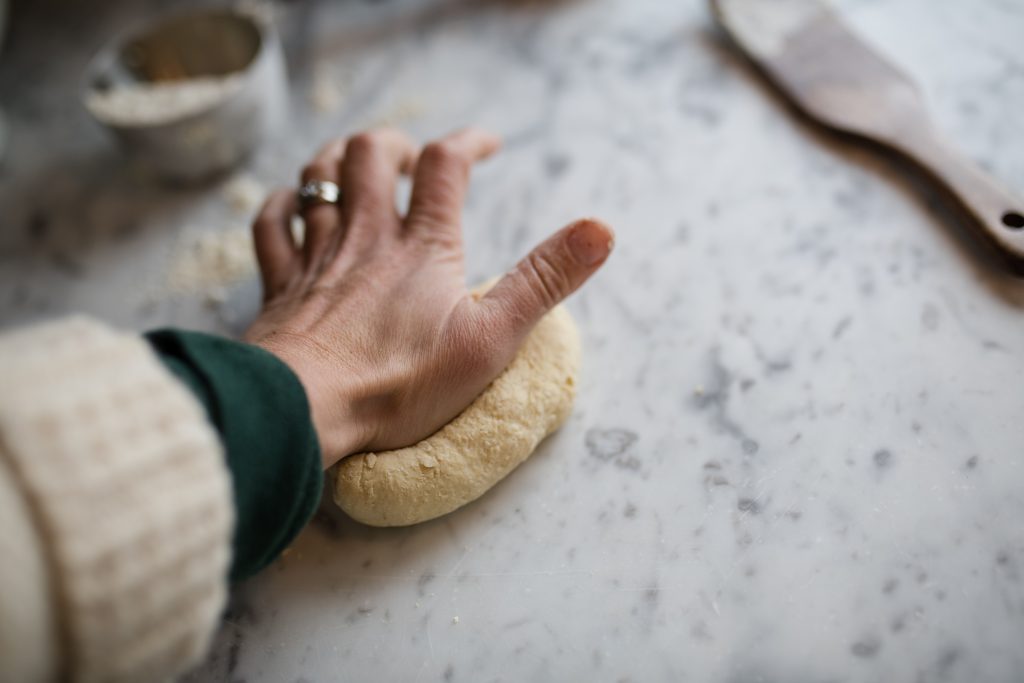
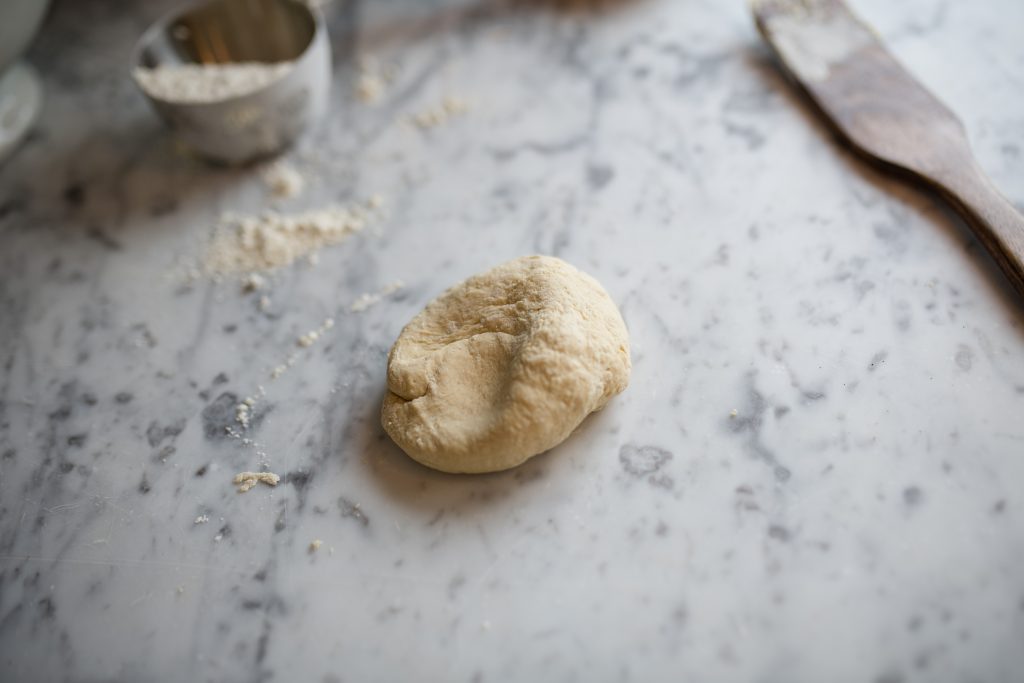
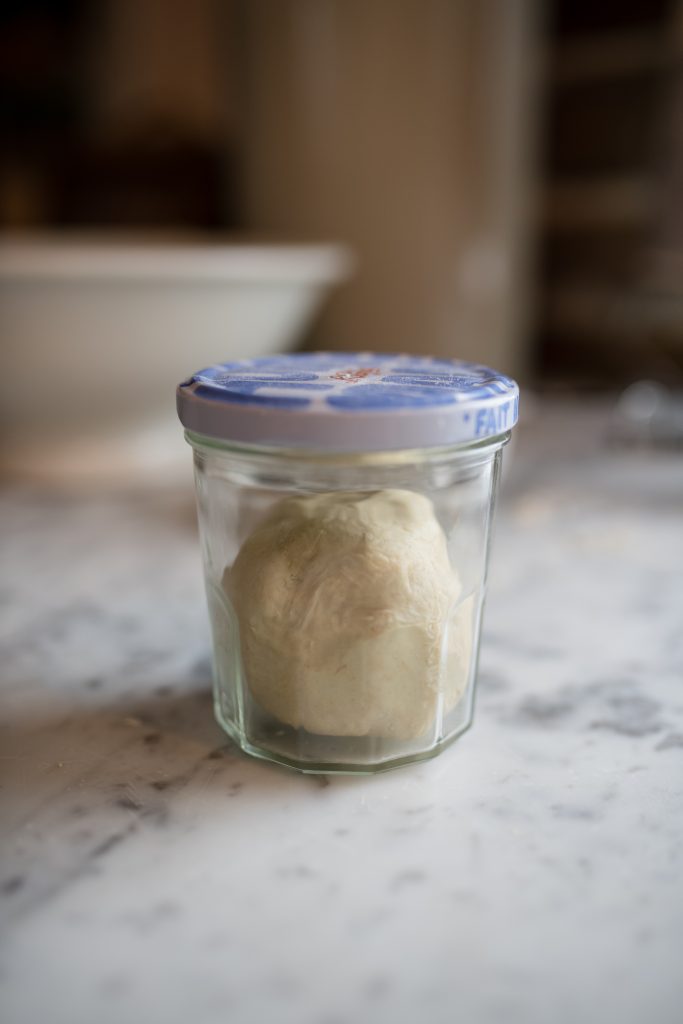
- Feed 1 tablespoon (about 30 grams) of sourdough starter with approximately 2/3 cup of flour (I do 100 grams of all-purpose einkorn flour) and 1/3 cup filtered water (I do 50 grams). Mix the starter thoroughly with a wooden spoon before transferring it to a smooth work surface. Knead the starter for just a few minutes, until it’s well combined and smooth. It should feel like smooth, slightly tacky Playdo. This is your STARTER. This is the ratio you will always feed your STARTER. Never use all your starter. Always keep that 1 tablespoon at the end to feed.
- Transfer the starter to a clean jar with a lid. I use various Le Parfait jars for this. Close the lid and let it sit at room temperature for a day. In that time, you’ll see the starter gently bubbly and aerate. Note, it will not bubble like a traditional wet-starter. This is still your STARTER. Your STARTER is now fed and happy! Here's how bubbly mine looks after a day out on the counter:
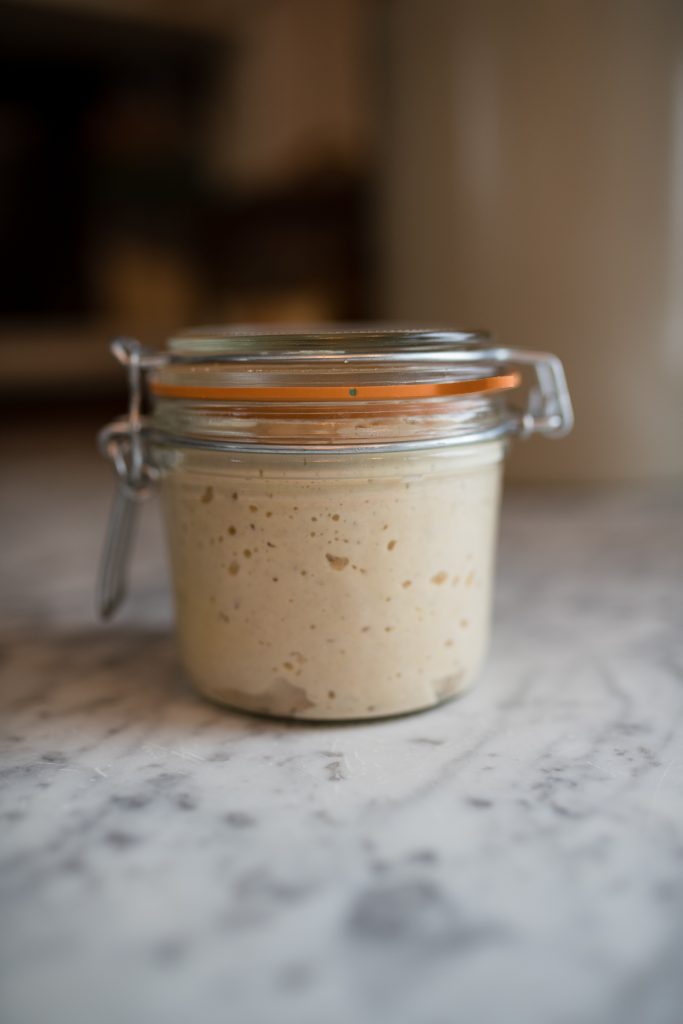
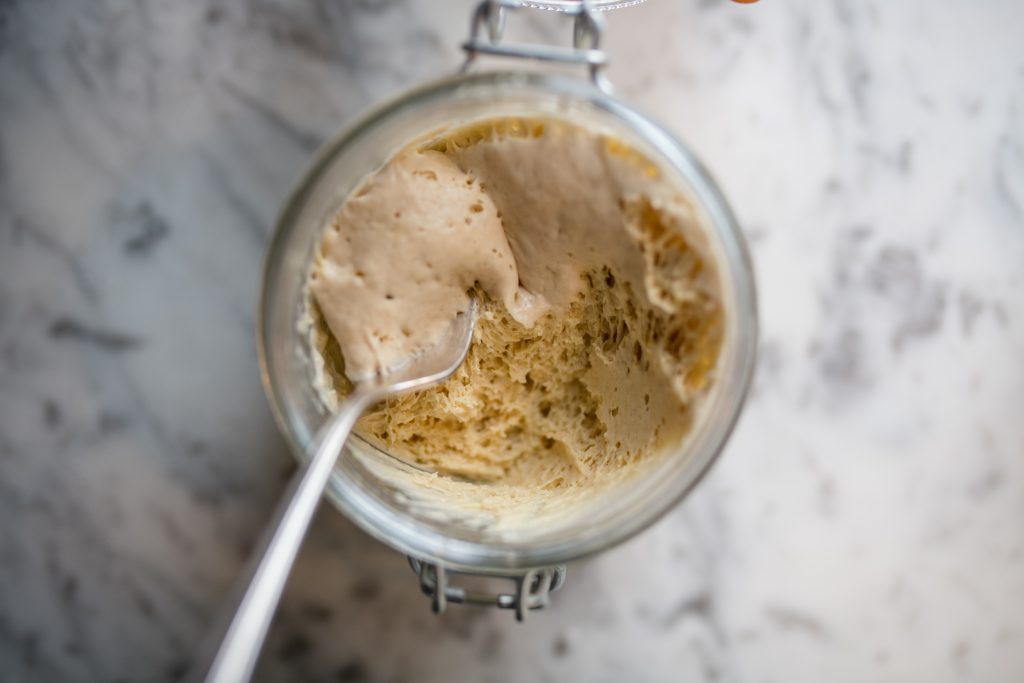
At this point, you can use a piece of the starter to bake with or transfer the whole jar to the refrigerator where it will happily sit until you need it. It can sit for weeks. Months even. If you let it sit for a really long time – like months – it'll be beneficial to feed it before baking with it, but you certainly don't have to.
If you don’t need to bake for a week, two weeks, three weeks, that’s fine. Just leave your starter in the jar, in the refrigerator.
Making Levain
Levain is the first step in baking bread. It's stage one of sourdough. The place where all sourdough recipes will begin. If you're making pancakes, english muffins, bakes, bread, waffles, or most anything: it all begins with making a levain.
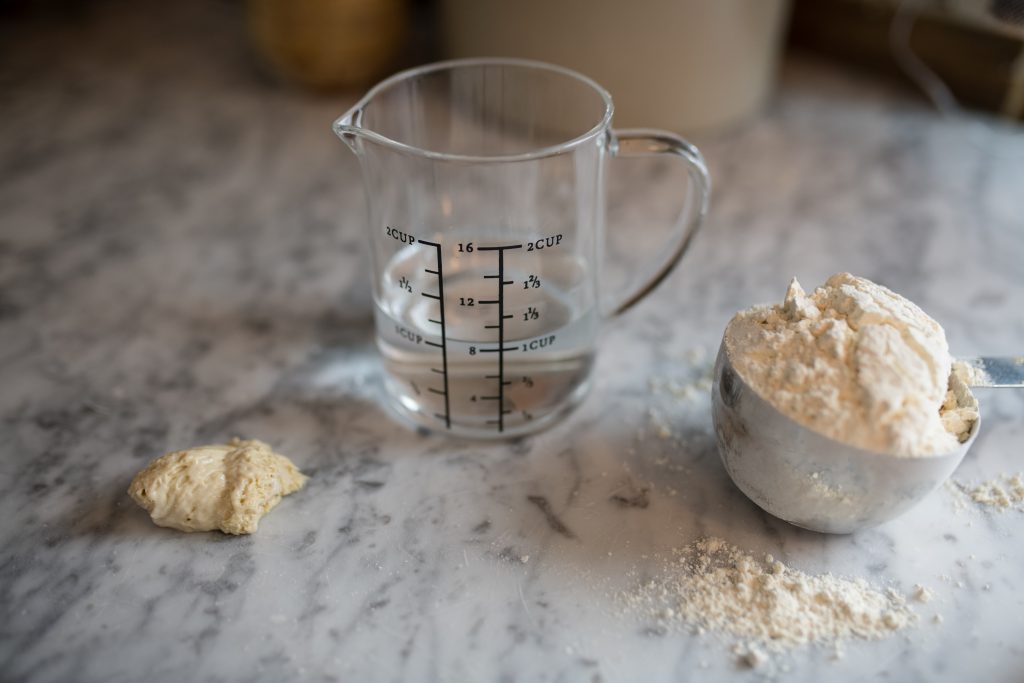
When you’re ready to bake something, remove the starter from the refrigerator. Remove 1 tablespoon (30 grams) of the dry-starter. Add this piece of dry-starter to a bowl. To the bowl, add in 1 cup (about 130 grams) of filtered water. Stir with a wooden spoon to combine the two, best as you can. Finally, add in 1 cup of flour (about 120 grams). Stir to combine the mixture well. It will be the consistency of cake frosting. Cover the bowl with a lid or plastic wrap and set in a warm location in your kitchen (I put mine on the top of my espresso machine) for a few hours (up to 12 is fine!). This is your LEVAIN. This is the step you’ll take before you bake anything.
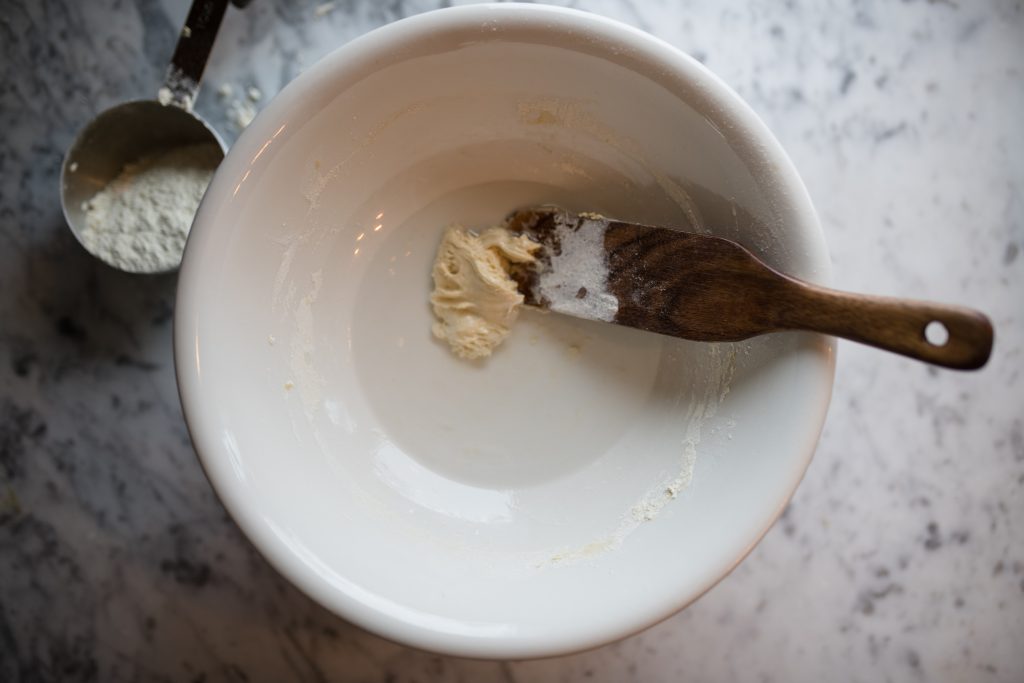
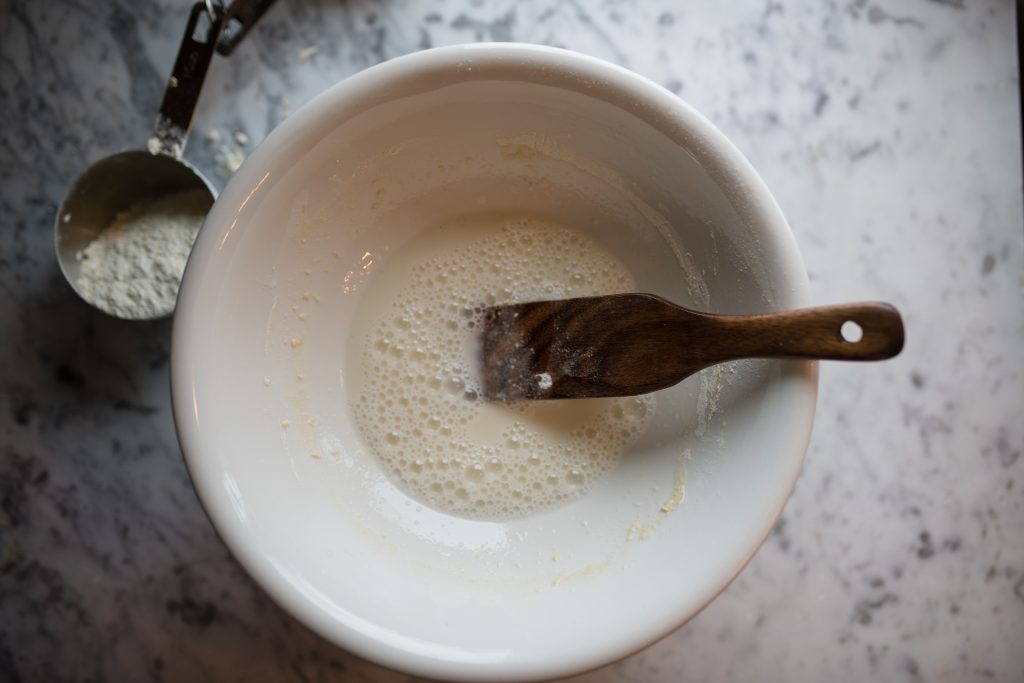
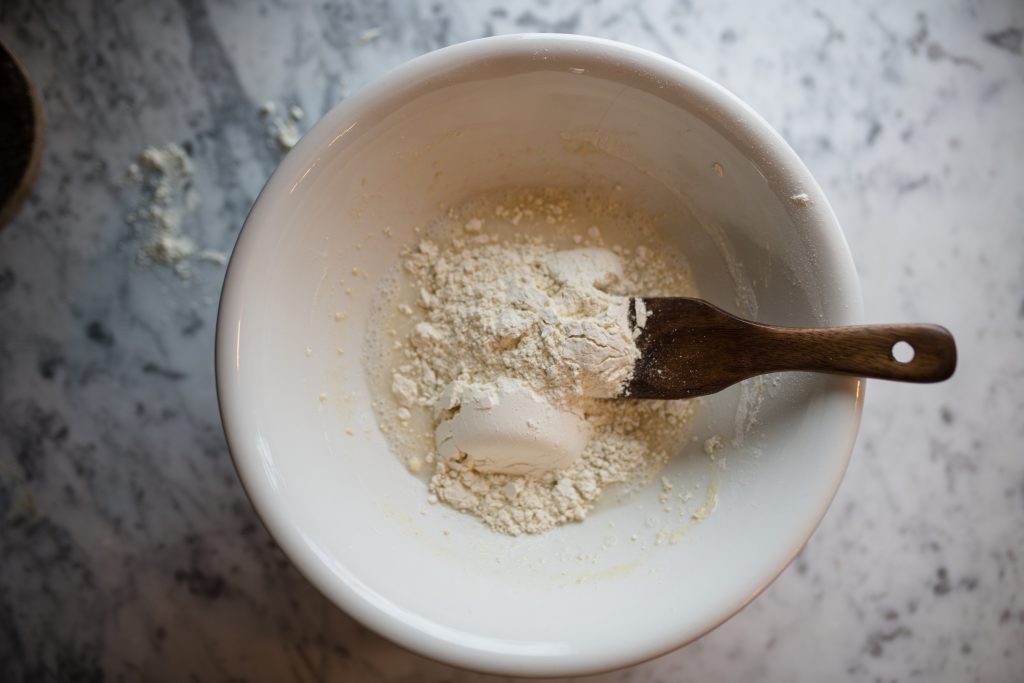
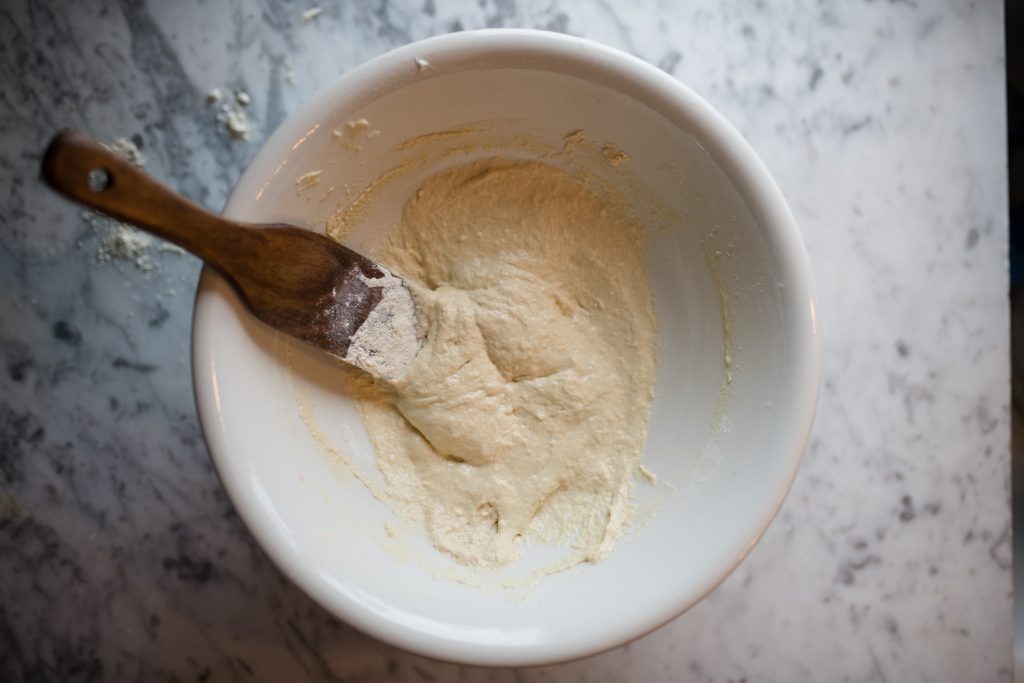
The mixture will have a few bubbles and smell of yogurt. This is your levain and it can be used in any sourdough recipe that calls for a standard wet-starter. For the sake of clarity in baking, this is called levain or pre-ferment. For example, if you’re wanting to make a bagel recipe that calls for “1 cup of active sourdough starter”, you can use this levain that you’ve just made!
The Exact Recipe. Again.
1 tablespoon reserved sourdough starter + 50 grams (1/3 cup) water + 100 grams (2/3 cup) flour= REFRESHED/FED STARTER.
1 tablespoon dry-starter+ 130 grams (1 cup) water+ 120 grams (1 cup) flour= LEVAIN.
Can I convert my wet starter to a dry starter?
Yes! If you’ve got a wet-starter right now, no problem! Just take a tablespoon of your starter and follow the starter recipe/ratio above. It may take your yeast a few days to adapt to the new ratio. Feed it, per the recipe. Then, the following day, remove a tablespoon of the now dry-starter and feed it again, per the recipe. This should be enough to get it on track.
Learn To Speak Sourdough
Ultimately, it's up to you to learn to speak sourdough.
- Meet and greet your starter. Introduce yourself. I always like to touch mine with my hands when I'm feeding it to say hello.
- The more you bake with your starter, the more those natural yeasts will populate your kitchen and the better your baking will get! I do not clean my kitchen with anti-bacterial cleaners that will destroy the natural and beneficial yeast and bacteria population in my kitchen. I embrace it.
- Your sourdough starter should smell like a healthy yogurt! It should not smell off, gross, or rotten.
- Flour (especially einkorn flour) does oxidize. Sometimes this will result in a darker covering on top of your sourdough (this will only happen if you forget to put the lid on or the lid is not put on tight). If this happens, no big deal. Feed your starter fresh, scrape off any that is particularly dark or off-putting to you, and carry on.
- Don't have 30 grams left in your jar to feed? No problem! You can feed 5, 10, 15, 20, 25 grams… really, even the smallest bit of sourdough starter left over is enough to start with. In desperation once, I even just scraped the edges of my sourdough starter jar and that was enough to populate my fed starter! If you don't have 30 grams exactly, don't worry about it.
Which brings me to my final point in this long winded post: chill out. Sourdough baking is meant to be enjoyable! Do not fret over every gram, every exact time. We are embracing principles here, not exact methods. This fretting over teeny-tiny details tends to come from a lack of confidence. That's okay! We all start somewhere. Try to keep it fun and enjoyable. If you misjudge something by an hour or two, that's fine. If you leave your starter out for 2 days instead of 1, that's fine.
Relax. Keep going. Bake on!




One thing that frustrates me is that I don’t know how to start a starter! Your first directions say to use a pinch of starter where am I making thisstarter?? how do I make the initial starter? go just mixed flour and water and hope for the best? I’m so confused please help
I have the EXACT same question 😁
Carla from Jovial has a youtube video explaining how to make a dry starter
Yes. Do her ratio. She has a post on how to make it. But baker creek has a starter that you could you to jumpstart the process.
I’ve just done this successfully from a video she posted. Here’s how to make this a bit more understandable:
Go to the picture that says combine. Dry-sourdough starter ingredients: 1/3 cup water (I do 50 grams), 2/3 cup flour (I do 100 grams).
Follow the pictures to the jarred starter. You just made the original starter.
I am looking for an answer and help on my starter. I am on day 4 of this.
Iam adding the water, but it is very difficult to dissolve this starter it is very rubbery. Should it completely dissolve? Everything else looks and smells fine and I am using a scale. So all measurements are good as well.
Thank you in advance for any suggestions or help you can give.
Rachelle
I made my own. All you need is flour, water a scale and instructions. But the easiest way is to get some established started from a friend/family. If you don’t know anybody with one just kindly ask a bakery for a piece of theirs. You can even call ahead and ask if they would be willing to. Most will gladly give you some to get started. Good luck!
I will share more on starting your own starter next week! I’m in the process of it right now so that I can show clear photographs alongside instructions. Stay tuned!
Thank you!! I want to learn how to do this. Looking forward to next week
Thanks, Shaye! I like the idea of your dry starter so much and want to start my own. Jovial einkorn flour should be delivered today!
Thanks! This looks more doable for me. Can’t wait to see how to get started making my starter! 😊 New life skill! Love you! ❤
I’ve just received my einkorn flour today & you’ve inspired me to try making bread. I can’t find the info on how to start my starter, when I could then make the bread & can I use regular bread tins for this bread? Any info you could give me will be appreciated. I’m very anxious about making my own bread, but want to really give it a good try. Thanks very much!!
I’m wondering if I can convert my Herman starter to a dry starter? It is essentially made and fed with potato flakes, sugar (I use honey), and warm water. It stays in the fridge and you only feed it when you need it. I only have a recipe that makes one type of soft bread with it. I am wanting to be able to make traditional sourdough that is more crusty, and even use to do it all baking. . I would love to use flour instead of potato flakes to feed. I have my first order of einkorn flour coming today! I am so excited and nervous to bake with it. Only because it so much more expensive than regular flour and I don’t want to mess up baking with it. 😂
Hello. I also use the Herman starter and I use this in every type of sour dough recipe. Since it’s much wetter I usually have to adjust the liquid/ flour ratio by a 1/4 cup or so both ways but it does work for artisan bread! I make loaves of it every week and it’s crusty and delicious. I took a regular artisan bread recipe of flour water salt and starter, adjusted ratios and presto. Play around with it. Your starter can be used in most sour dough recipes. I like it this starter because the sour dough taste isn’t quite as strong as regular sour dough but is still there, so it’s easy to use for things like brownies and bagels without tasting too sour.
Laura, did you figure or find out the sour dough starter recipe by chance?? If so would you please share??? Thank You
Get the recipe for your starter from the clever carrot. Works for me every time and converts to this dry starter very easily.
I’ve just done this successfully from a video she posted. Here’s how to make this a bit more understandable:
Go to the picture that says combine. Dry-sourdough starter ingredients: 1/3 cup water (I do 50 grams), 2/3 cup flour (I do 100 grams).
Follow the pictures to the jarred starter. You just made the original starter.
I go to the Facebook page The Prairie Homestead for how to start a starter.
Your best bet is to get a starter from some kind soul- then transform that into this dry starter.
She has a video or blog somewhere talking about making a starter…. I’ve tried 2x and failed (my own forgetfulness) but I just got a starter from a friend and now I’m hopeful I can change it into a dry starter now that I’ve got the first step
Hi Shan. Were you successful at turning a traditional wet starter into this dry starter? I stumbled across this post on day 5 of making my own starter. I’m wondering if I can convert it to this dry starter and how or do I have to start over with her instructions. Any input would be great. Thanks.
Exactly! You need a wet starter to begin with if you are converting from wet to dry. To start a dry starter from scratch combine 1:2 water:flour and let it sit in a warm place for 1 day then take out a tbsp of starter and add that same ratio then combine and wait another day. I used a mason jar and just didn’t screw on the cap all the way. I started with small amounts like 1Tbsp water & 2 Tbsp flour. Each day check for bubbles and a slightly sour smell-that means it’s alive! After 3 days the starter should be established and bubbly and you can take some to make levain and keep the rest in the fridge! You can feed as little as once a month or every day! It depends on how much you bake sourdough. In the kitchen near fruit it will be more active quicker because of the natural wild yeasts in fruit skin. If you leave to rise in the kitchen keep an eye on it as it may rise faster than in another room of the house. I hope this helps! Wishing all happy and delicious baked goods! Love, Keiko
you were able to get a astarter going with 2:1 ratio? i’ve been successful with 1:1 ratio and found this while looking to use less flour for maintaining. I used 30g of my 1:1 starter and added 50g water and 100g flour. I guess were not concerned with the original 1:1 ratio of starter? I am following the recipe of 30g starter 50g water 100g flour, but also trying 30g 1:1 starter, 25g flour and 20g water to keep a true 2:1 ratio and to accurately calculate hydration. I’m just that way, lol
Shaye has a YouTube video on her channel about how to start from scratch to make her starter. Its really easy to follow. Good luck!
I watched her video, to make the starter it’s 30 grams water 60 grams water. Then cover for 2 days, on third day 30 grams water 60 grams flour cover some on fourth day on the fifth day refresh the starter after this is where I get confused. What does she do with that discard
This looks so helpful! I don’t have time to bake with sourdough multiple time a week and this might just be what I need. Now to print all this off and stick it in my baking binder! Thank you for the clear instructions!
https://theelliotthomestead.com/2020/05/sourdough-starter-why-a-dry-starter-is-best/
Thank you!!
Thank you. Thank you. Your instructions are clear and straight forward. I have wanted for a long time, and have now been given a wet starter. Now I know what to do with it.
“A little leaven leavens the whole lump.” Thanks for sharing your method Shaye.
Question on the levain-
The grams for 1 cup of water is 130 grams? I’ve been using 236 grams water = a cup.
Thanks
I would follow the weight only with the recipe above (and for all the Jovial recipes) because volume measures are so volatile.
I would like an answer to this from the author. I have the same question. Her gram measure for water in the booklet recipe is half the cup measure. ? I used the g measure.
Whoever told you wet-starter need to be constantly fed played a trick on you.
I have a 1:1 starter and I feed it maybe once a week (because I bake), but even 3 weeks are not problem. Typically there are only 10-20g in the jar, when I need some I feed exactly what I need the next day.
And what those that want to make their own starter, look up “Bake with Jack”. His method takes 4 days, produces only 200g – and zero wastage! That’s all you need.
Agree and I too followed baking with Jack approach. Works well with my once a week or so baking schedule.
I do like this dry 2:1 ratio concept however as well. Going to play around with that as I have two strains of starter. One a 100% rye another 50/50 rye/AP.
I have been using Shaye’s method (from Carla) since I started using sourdough last year. I did try a few other methods but this is the only one that has worked for me. I make a loaf of bread about 3 times a week and a few other things and my starter is a happy little fat jar in the fridge. So thank you again Shaye, for teaching me yet another skill to add to my belt! X
Would you share your loaf recipe please? Thank you
I started my sourdough journey with Einkorn and stiff starter. My question is – how do I adjust for regular starter that is many recipes? Do I just make the levain and substitute the same amount of grams as the wet starter?
This sounds very similar to Desem Bread (traditional Flemish sourdough). Only they would bury the lump of dough in a crock or sack of flour and keep it at cool temps so the yeasts captured gave a sweetish tang to breads, instead of a sour flavor. Does sourdough bread made like this have a really sour flavor? Or is it also sweet?
In my experience with this method it is not very flavorful-tangy or otherwise-just good bread flavor 🙂
Question! So, I have a Jovial einkorn starter I have carefully maintained for over 10 yrs now. I am curious though if you have encountered this problem. I have many different books that are on sourdough baking, and I believe most of these books use a wet sourdough starter. What can I do to make my starter work with their recipes? Have you had this issue too? What can I possibly do? Thanks so much!
Thank you, Shaye for sharing this technique. I converted a bit of my very happy, wet starter to your dry/stiff starter one week ago. I was so shocked to see that stiff little ball of dough turn into a full jar of bubbly goodness!
But, I hope you can spare a minute to answer a question. I understand how to refresh the dry starter. I understand how to make the levain to then measure from as my “active starter” to use in any recipe calling for active starter. What I don’t understand is how to end up with the equivalent of wet “discard” that is used in so many recipes. Is there a conversion for that? Like mix x g dry starter to x g of water? Would it be used right away upon increasing the hydration or be given a little time to wake up?
Shaye, I appreciate your very clear instructions. I have never made sourdough, and I’m trying to learn all I can before jumping in.
I love this idea! I only make bread every couple of weeks and my recipe makes 5 loaves. I normally use 4 1/4 cups of sourdough starter for the recipe. Any ideas on how much of the dry starter to use to make that quantity?
Just used your how to bake better bread recipe and it turned out so good!
I had let my wet starter die (on accident) and was given some fresh starter from a friend at church. After making your bread recipe with my wet starter I just converted it to a dry starter. Fingers crossed that it turns out as you say it will in converting it. And then it’s easy peasy from here on out.
I’ve been making dry starter from your tutorial last week. Day 3-4 it was bubbling away, but now on day 6 there are no bubbles. Instead of putting it in the fridge after 12 hours I’m waiting longer to see if anything happens. What went wrong? Is there a way to revive it?
Thank you for sharing this! I’m so excited to convert my 100+ year old wet starter to a dry one 🙂
I started a dry starter MONTHS ago. Months and months. I only used it once to get my traditional wet starter going. I had 2 dry starters.
That died. And I decided to try again. I made a NEW dry starter from my old ones for the sake of practice. The first ball I made took about 2 days to get active. I mixed it in the evening, and the next evening it hardly had bubbles. I let it sit again and by early next morning it was bubbly! ~30 hours. House was cold.
I now have 4 dry starters because I made new ones from the old ones. I’m a nutcase and can’t toss them. I’ll probably use them for gifts when they’re at they’re last tablespoons.
* the old dry starters had a layer of hooch, one was clear and one was gray/black. I mixed it in and all was well.
Will the levain simply bubble or should it double in size?
If it does bubble, it increases in size. If you are not using a clear fermenting container, you are missing seeing the action. Remember, sourdough is a tactile and visual experience. Containers that taper wider to the top are more difficult to see a volume doubled. Store branded bleached all-purpose flour can double but you might want to let it autolyze for about ten minutes before mixing in your starter. Unbleached store branded flour is not much more in cost and really offers impressive performance quality.
Beatiful photos, big idea! https://www.ventioncable.com/product-category/hdmi-cable-splitter-switcher/hdmi-cable/
Would these measurements also work well with different types of flour…particularly kamut flour?
I am unclear on keeping the starter in fridge. How long will it keep? Oh and thank you for sharing.
1:55 on her video https://youtu.be/0zHW2chG27Q
She shows how to make the starter.
This sounds like a great method. I would like to try it. Can you use 50:50 rye and all purpose for the flour portion of the feed? I use this for my current starter.
Thank you Shaye! I’m so excited to learn this technique. I’ve been preparing to sell sourdough loaves and other goodies at the market, and this sounds like a way to improve my starter and lower stress on the Homestead. I love your way of teaching. Thank you for the amazing recipes and easy meal ideas. I love Italy too. I feel like I’ve finally found a like minded friend. You are a blessing. Using my earnings to join your community. Can’t wait.
Hi! One thing is, once my oven was out so I wasn’t baking, so it was left in the fridge with a lid and guess what? It got completely moldy. So, it’s a good idea to refresh once a week even when you’re not using it.
When making the bread is it ok to combine all purpose flour and whole-wheat flour?
And why do I have to use filter water.
Can I add sugar to the bread instead of salt.?
Thanks
I have been following your method for a dry starter and realized that it won’t turn out like yours because I am using fresh milled whole grain einkorn, whereas you use all-purpose einkorn floury. Can anyone tell me how to make a dry starter with whole grain einkorn?
Did you get an answer? Go to jovial foods website and look for starter instructions she gives the amounts for both flours.
Wonderful write up on the sourdough starter … so little useful and detailed, common sense information on working with stiff starters out there.
Really well done.
I enjoy making my own bread. I just don’t do it often enough. I tend to use most of my flour for feeding a wet starter. I had a routine for storing my starter in the refrigerator years ago, but I lapsed on baking for several years and forgot what I did. I was somehow able to keep a reasonable amount of starter refrigerated and it worked for several years. I finally got a strong starter going recently that is kept at 1:1 ratio flour and water. Am I correct that if I add 30g flour to 30g of my wet starter, I will now have your 2:1 flour to water ratio for dry starter? I will also change the starter hydration amount in my calculator to 50%? Thank you
bad math. add 15 g flour to my already started 30g 1:1 wet starter for 2:1 ratio, 30g flour 15g water.. Add 25g flour and 5g water for a 60 gram 2:1 dry starter, 50% hydratiuon starter. The 56% hydration in this recipe probably doesn’t make much of a difference
I would love some clarification on this. I am not a sourdough noob but this is confusing as written. For example, the first time you remove 10g and add 30 of water and 60 of flour, is the rest thrown in the trash? If so, why? If we want to use that, how do we do so?